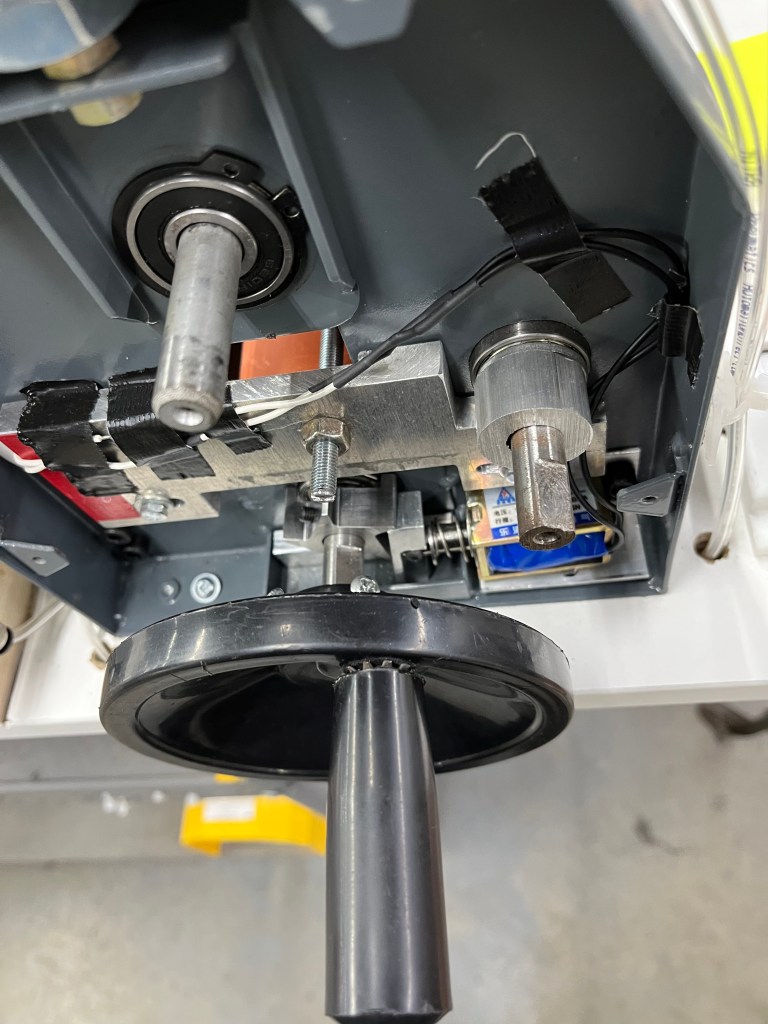
As a Manufacturing Engineer and Mechanical/R&D Engineer at Velatron Technologies, I took on projects that aim to create efficient manufacturing practices as well as designing methods for building custom electronic components. These are some of the more prominent project I took on while at the company.
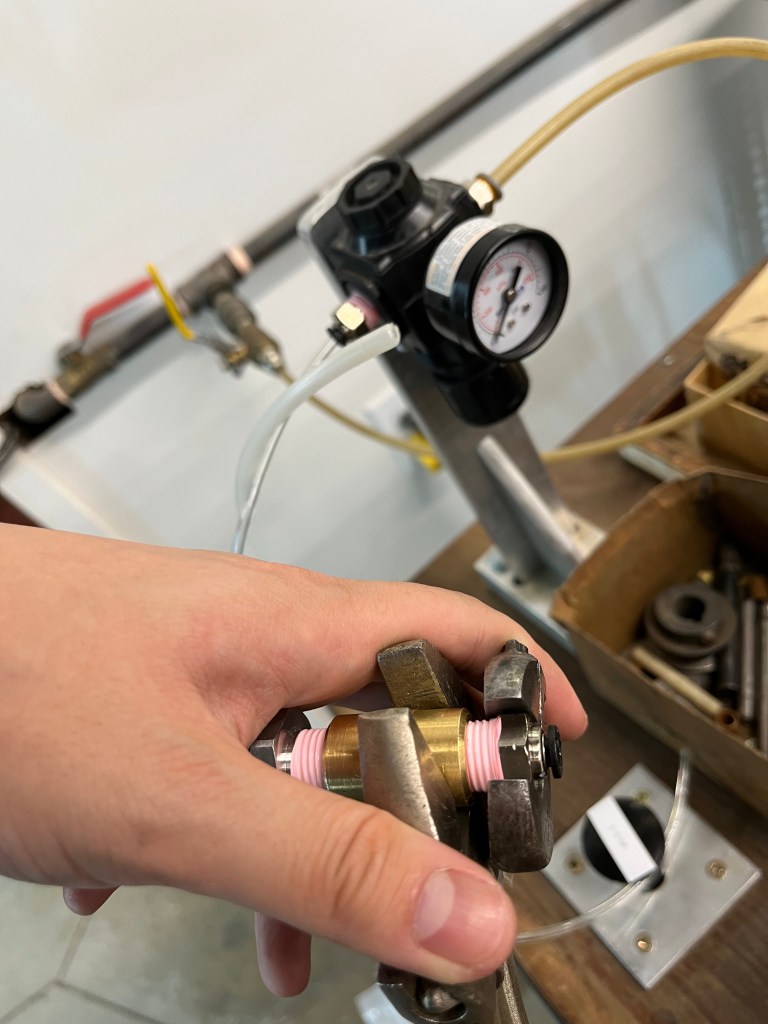
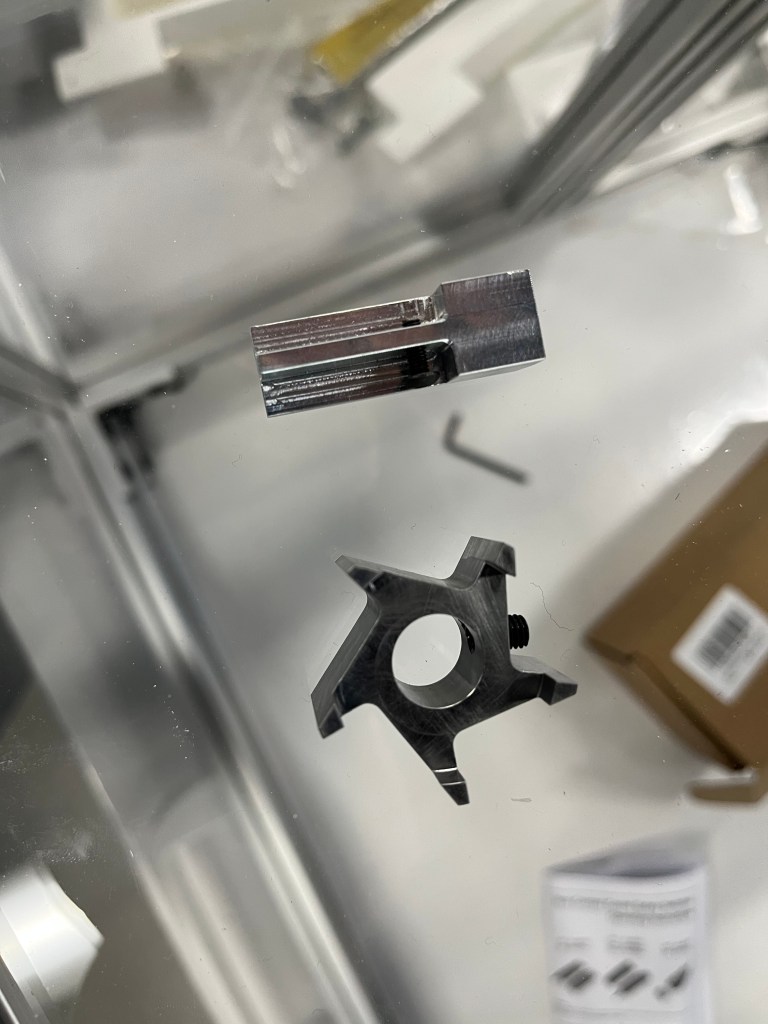
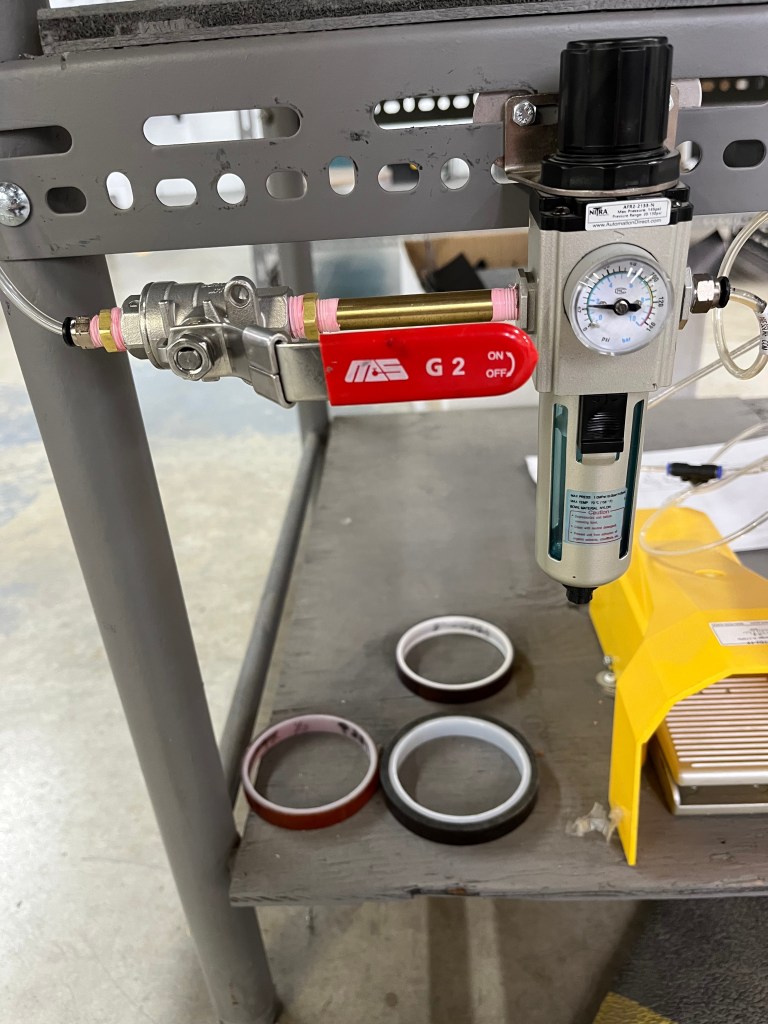
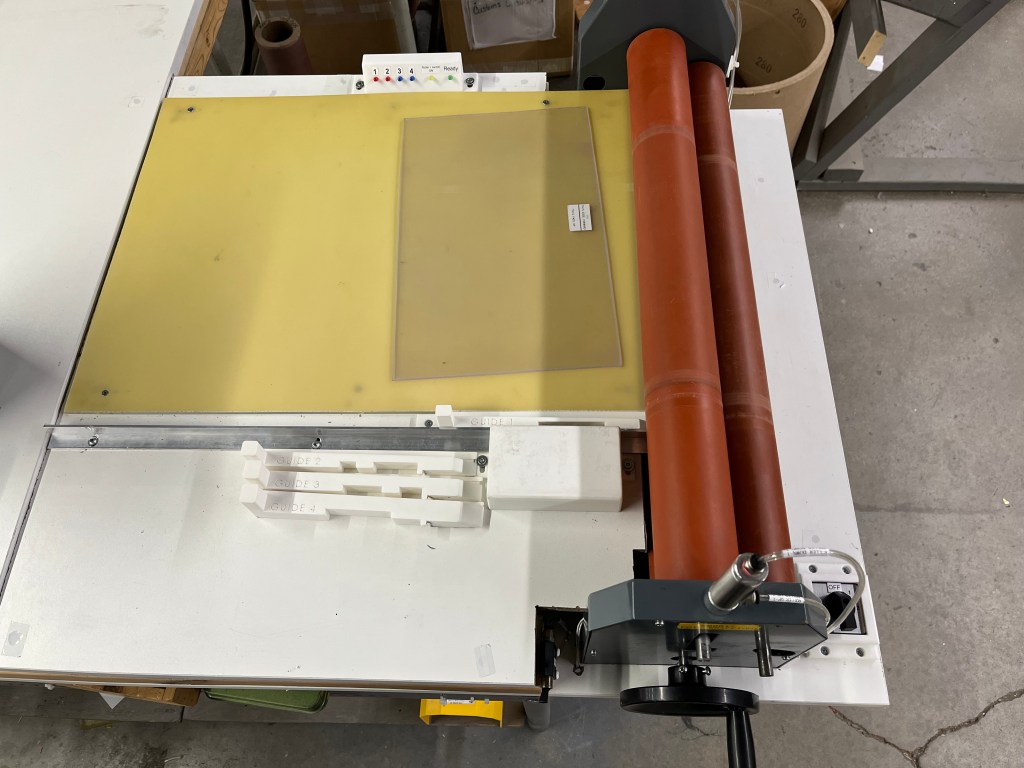
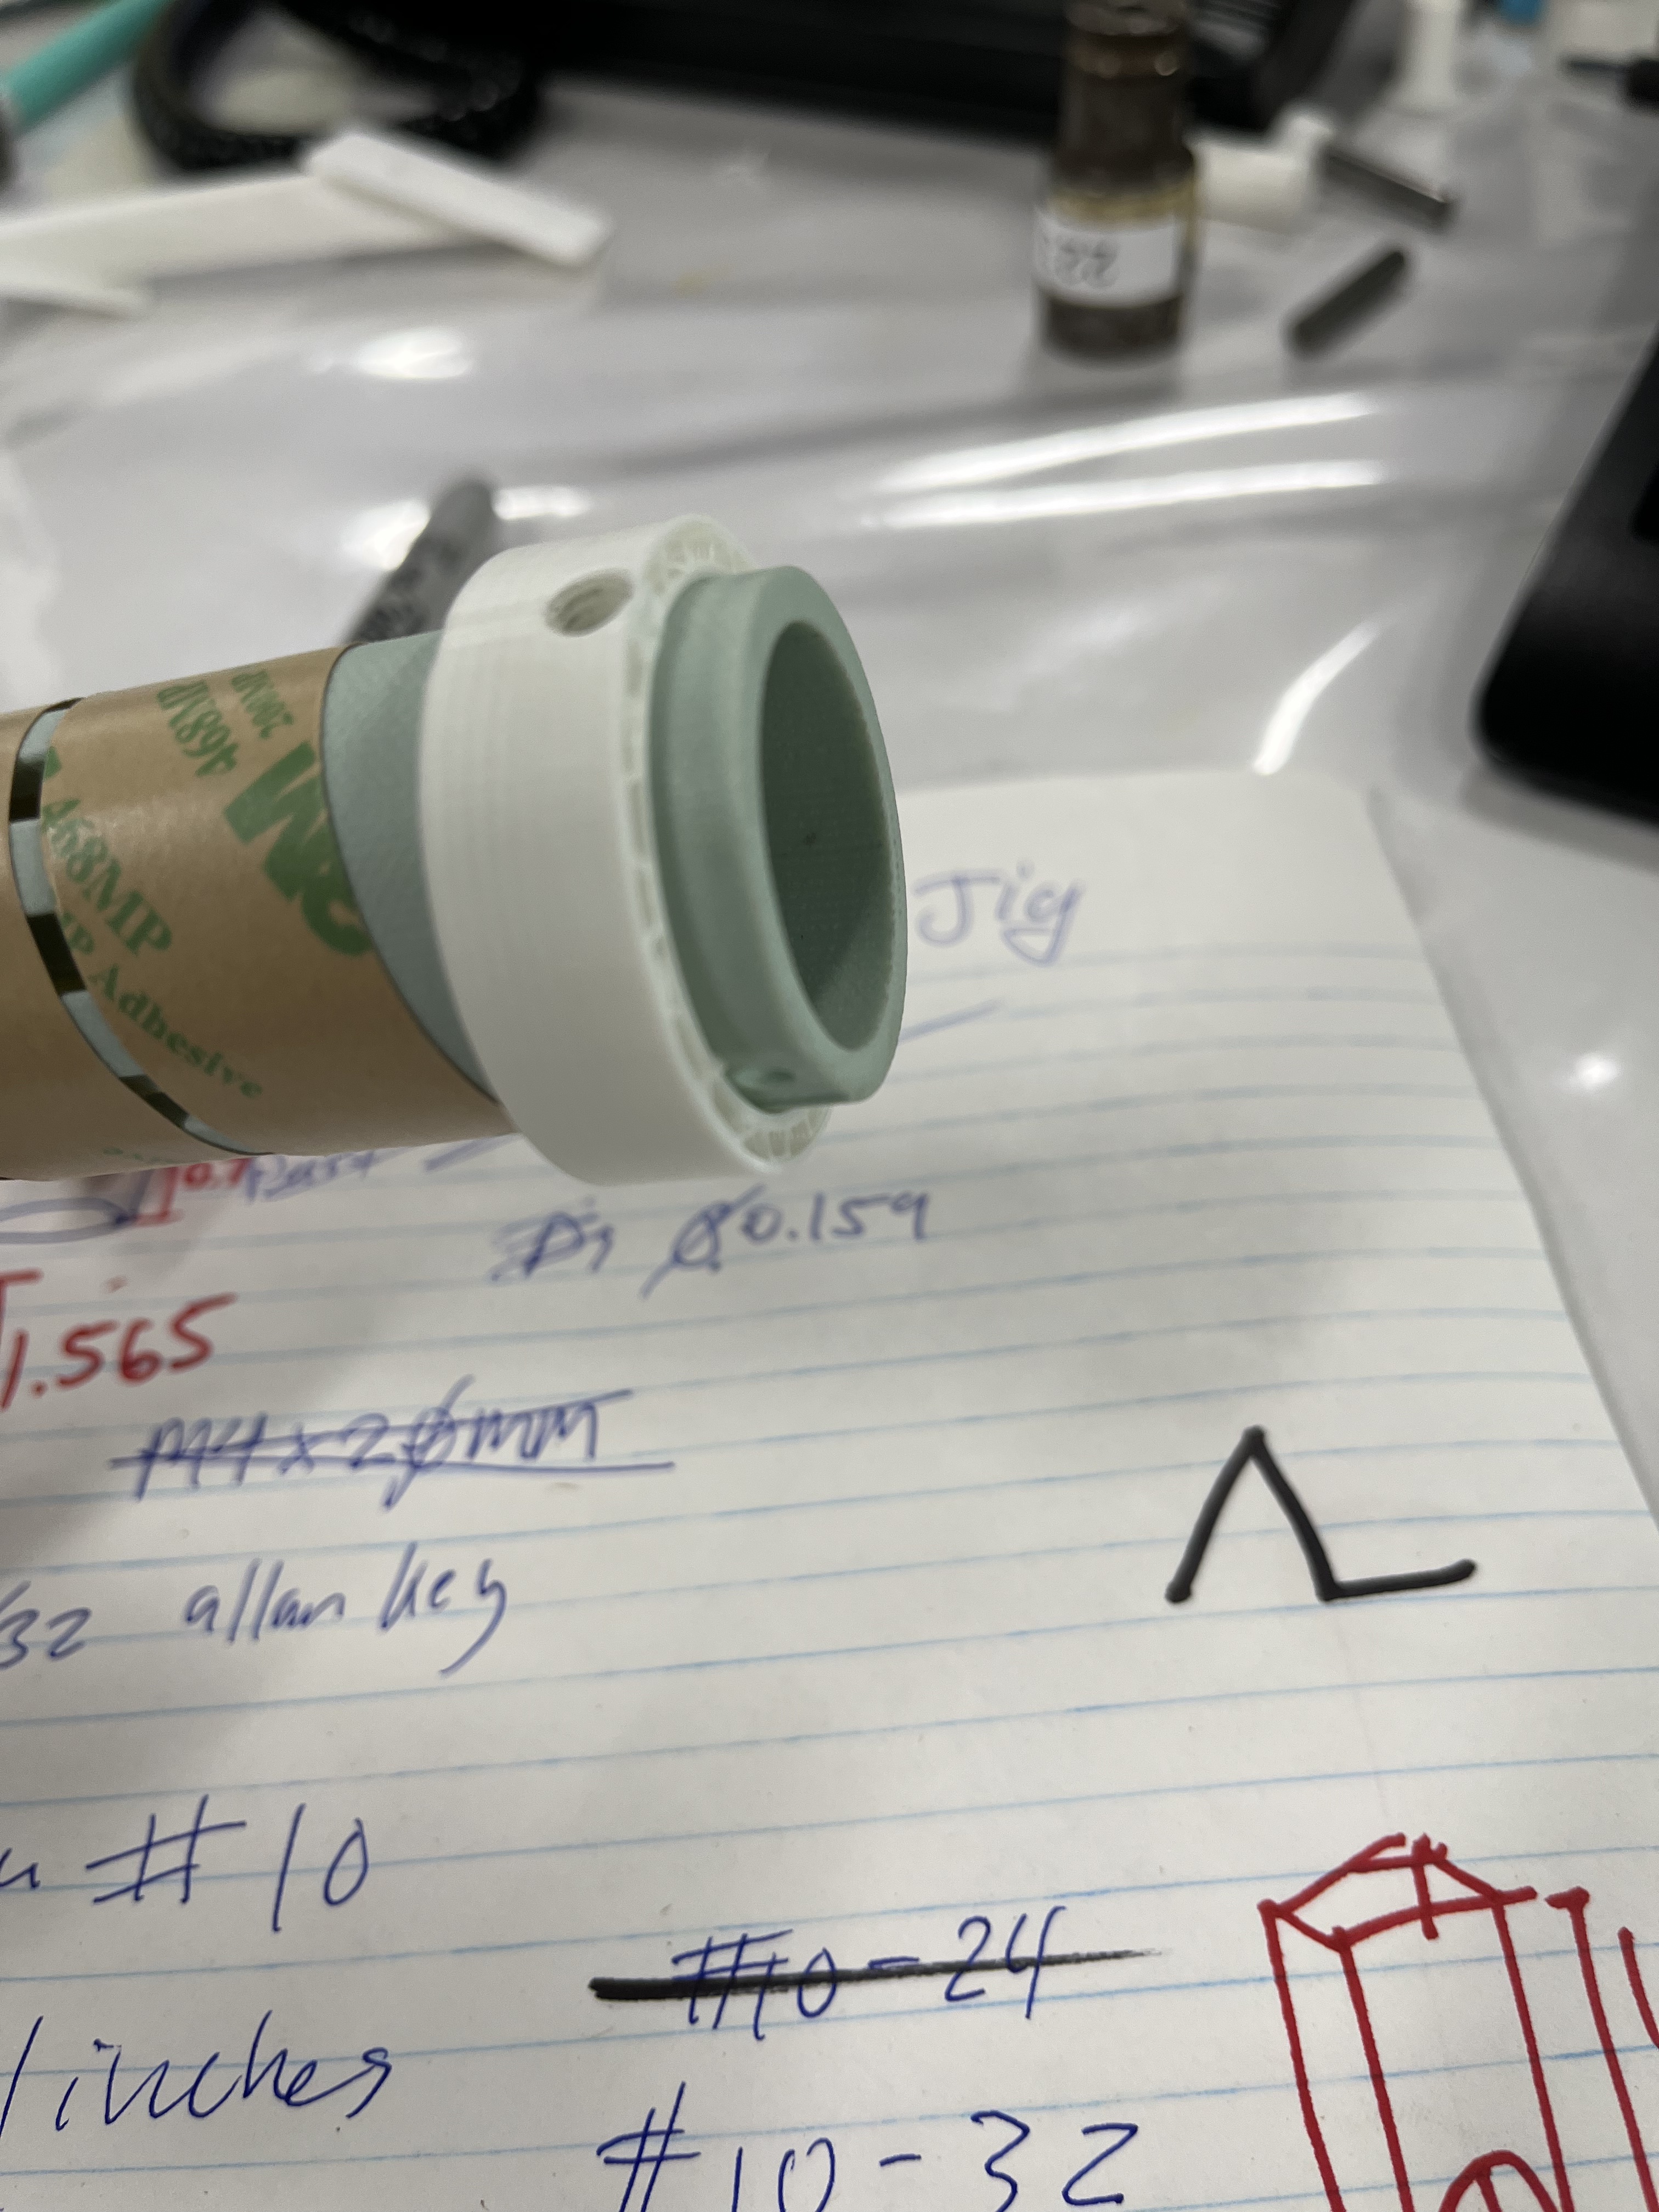
Antenna Winding Station
Sept 2025 – Dec 2025
What
Converted an existing pneumatic roller machine into a reliable, multi-purpose antenna winding station for production use.
How
- Upgraded the pneumatic system to improve consistency and control
- Designed custom tooling and fixtures to support antenna winding operations
- Integrated an electrical warning and braking system for operator safety
- Developed precision cutting jigs achieving ±0.008” tolerances
- Defined the manufacturing technique and created step-by-step production documentation
- Outlined improvement roadmaps and next steps for future co-op students
Result
- Enabled future scalability toward high-volume manufacturing
- Delivered a production-ready machine suitable for repeat use
Improved process reliability, safety, and dimensional accuracy
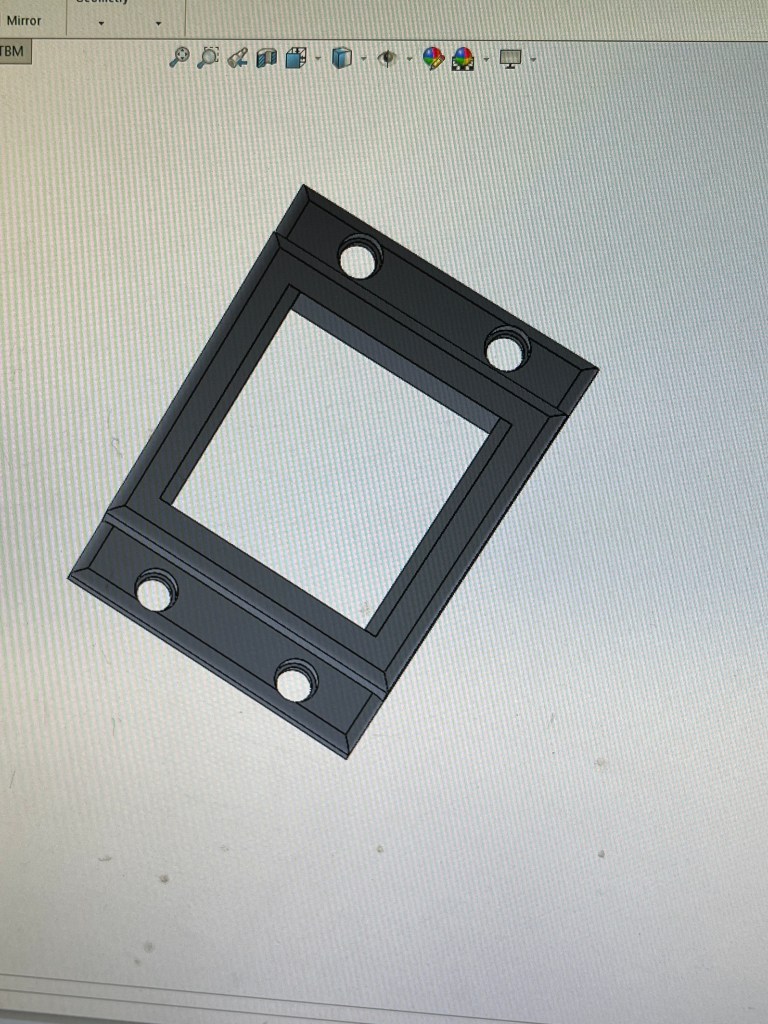

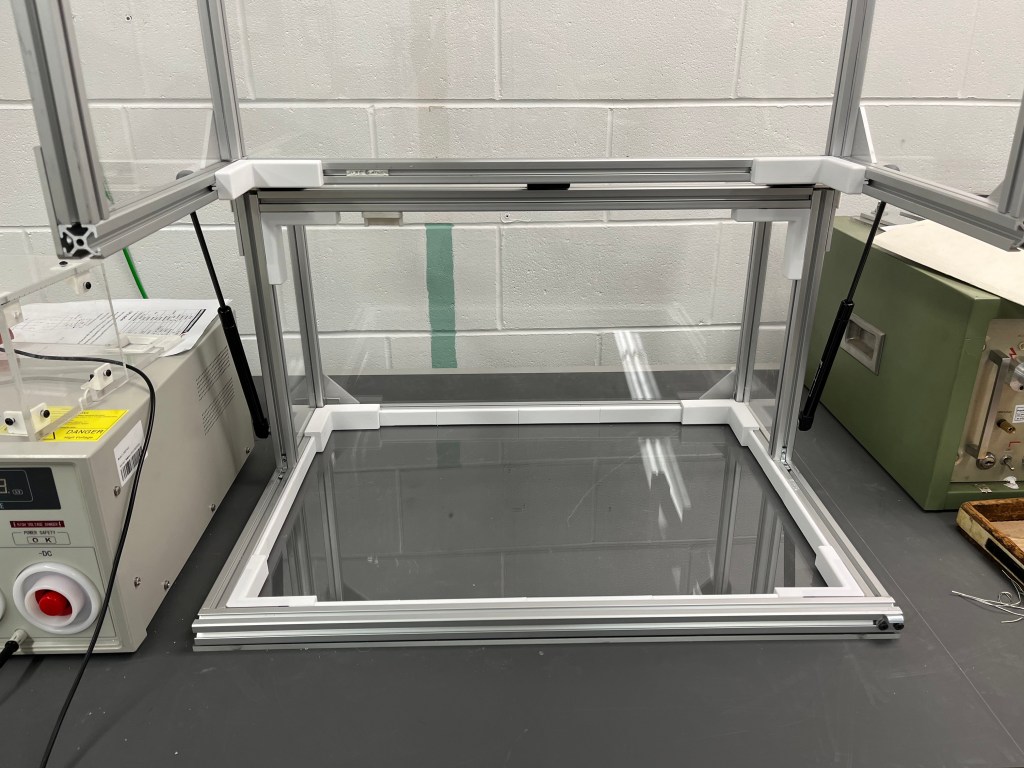
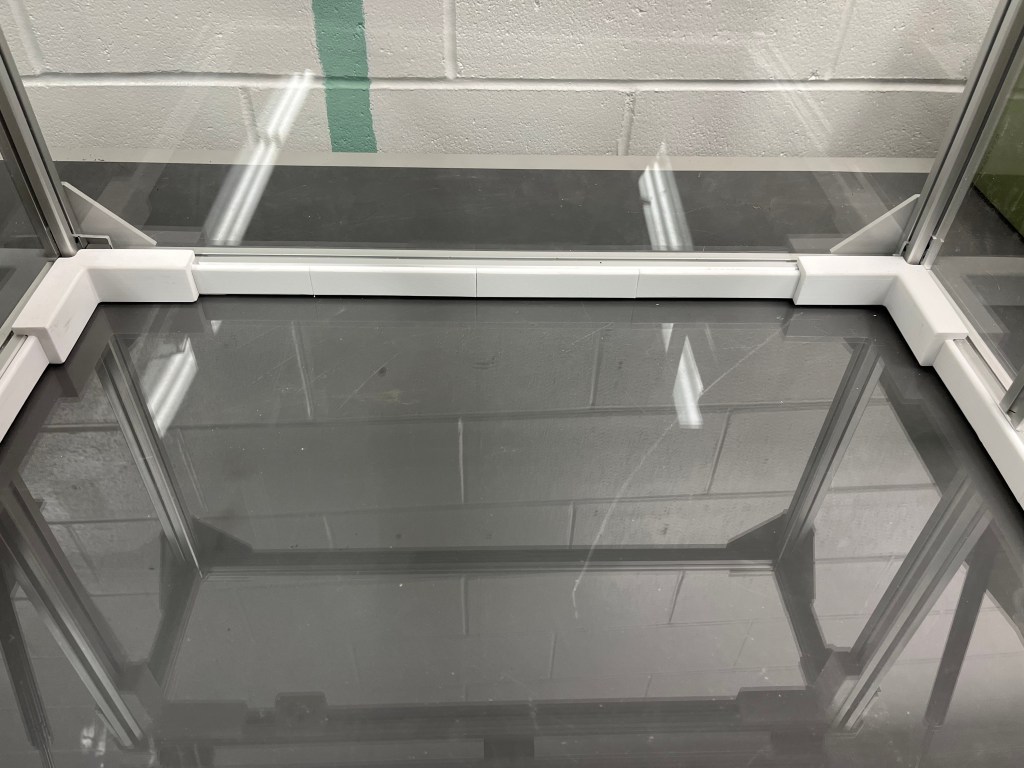
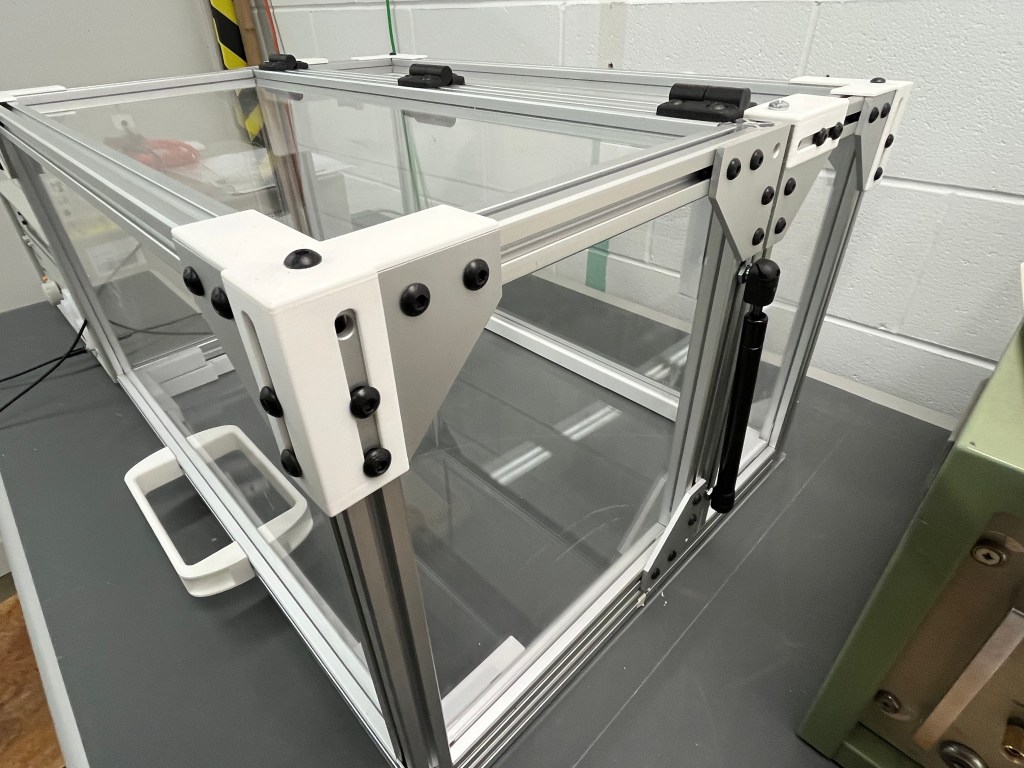
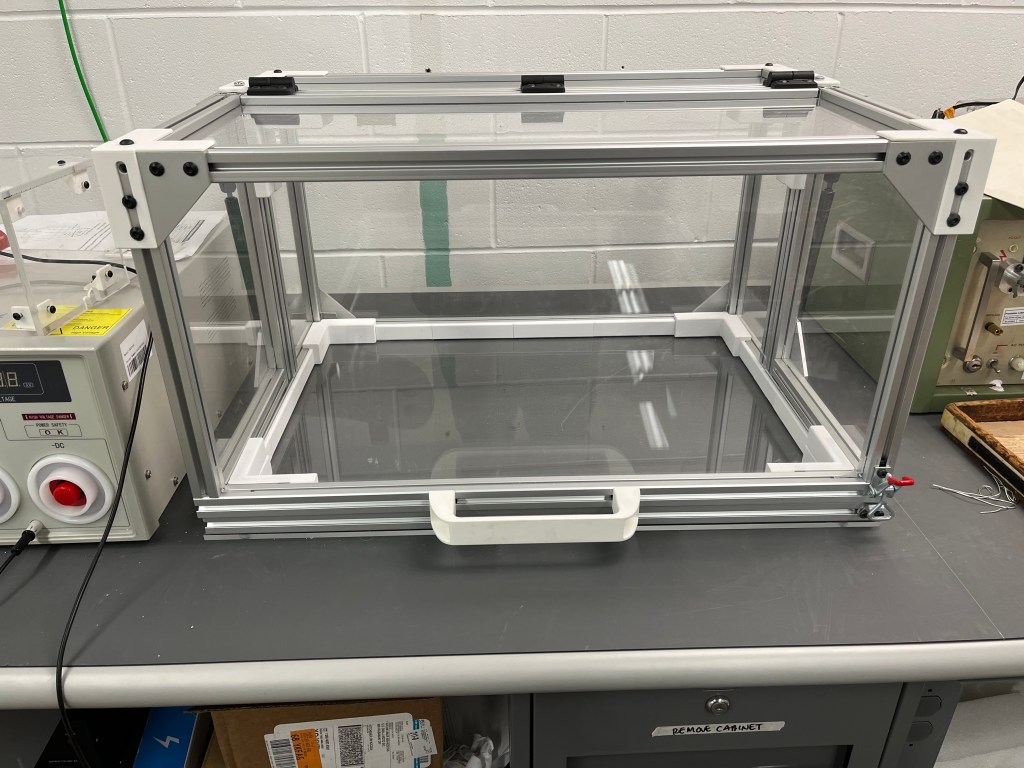
HiPot Testing Enclosure
Oct 2025 – Dec 2025
What
Designed and built a reusable high-voltage safety enclosure for hipot testing in a production environment.
How
- Collaborated with electrical and manufacturing engineers to integrate the enclosure into an existing electrical safety box system
- Researched applicable high-voltage safety requirements and best practices
- Independently designed, machined, and assembled the enclosure
- Integrated electromagnetic safety interlocks to prevent operation when open
- Added gas shock mechanisms for controlled, ergonomic opening and closing
- Designed and 3D-printed a PC-FR insulating base to improve electrical isolation
Result
- Rated for electrical testing up to 20 kV
- Deployed as an active production tool in manufacturing
Improved operator safety and standardized high-voltage testing procedures
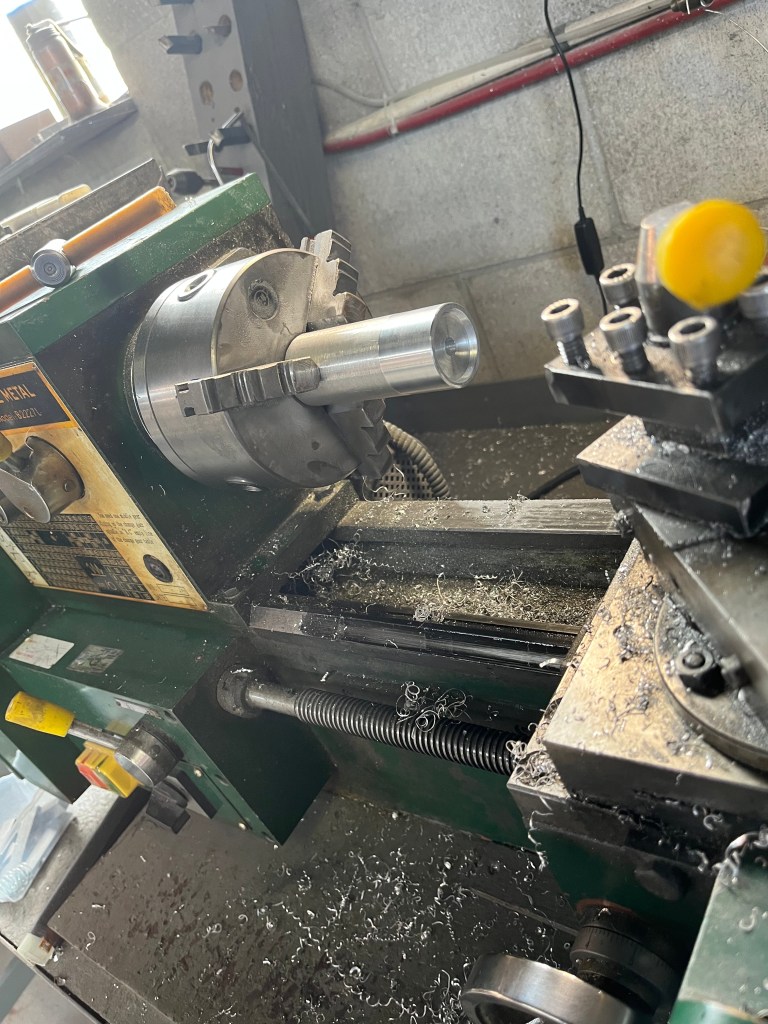
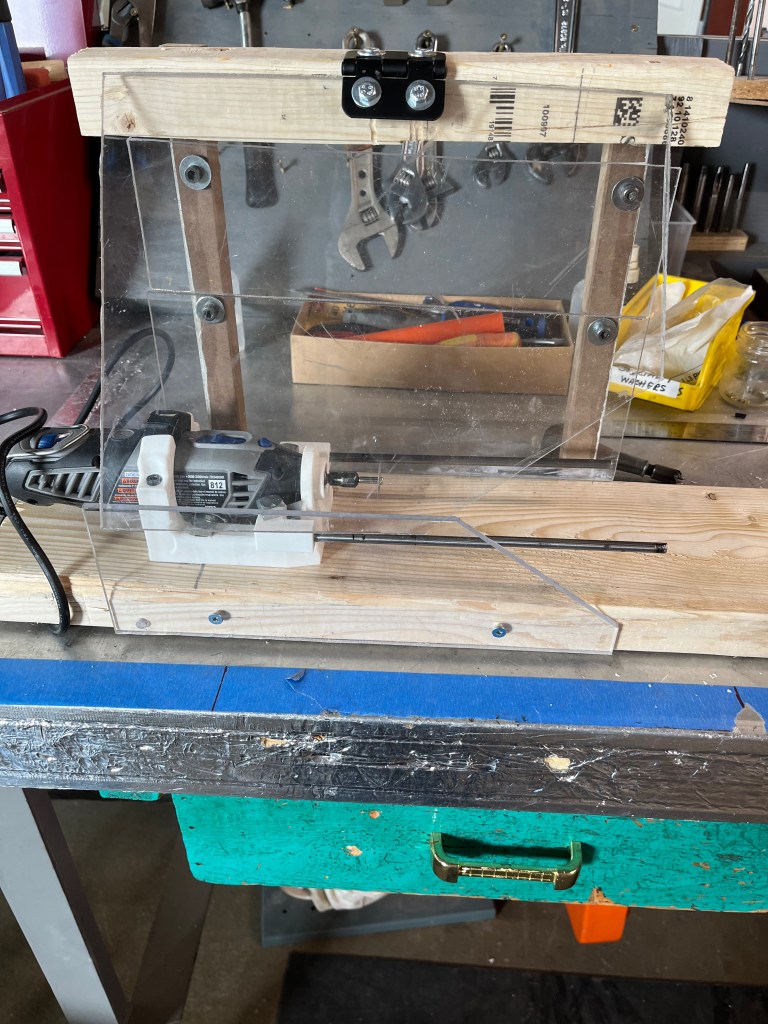
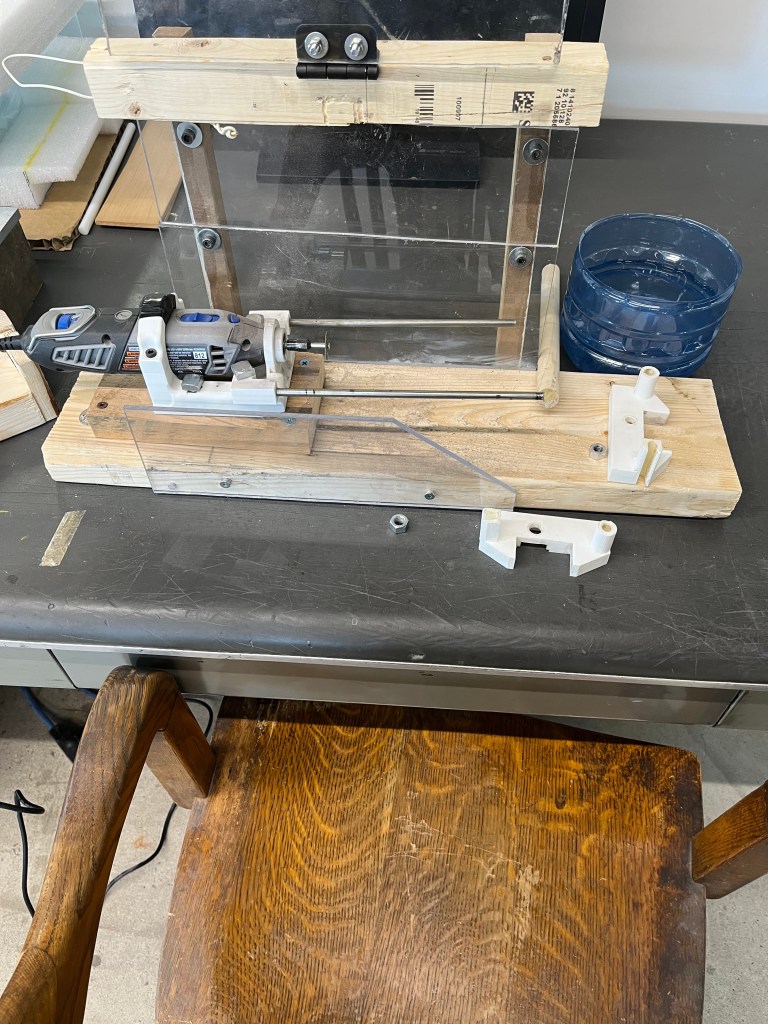
Tube Guillotine
Feb 2025 – Apr 2025
What
Designed and built a high-efficiency tube-cutting “guillotine” to streamline material preparation in high-volume production workflows.
How
- Designed a spring-loaded handle to provide fast recoil, reducing cycle time and operator strain
- Machined an aluminum baseplate to support the jig and guide tubing smoothly into the cutting zone
- Designed and integrated a custom-machined blade for clean, precise cuts through plastic tubing
- Added a gravity-fed drop system to route cut tubing directly into a collection basket
- Integrated a transparent plexiglass safety cover with dry-erase measurement markings for quick size changes
- Included an adjustable stopper to ensure repeatable, consistent cut lengths
Result
- Delivered a durable, production-ready tool that reduced manual handling
- Significantly improved speed and ergonomics in material preparation
- Increased cut accuracy and repeatability for high-volume workflows


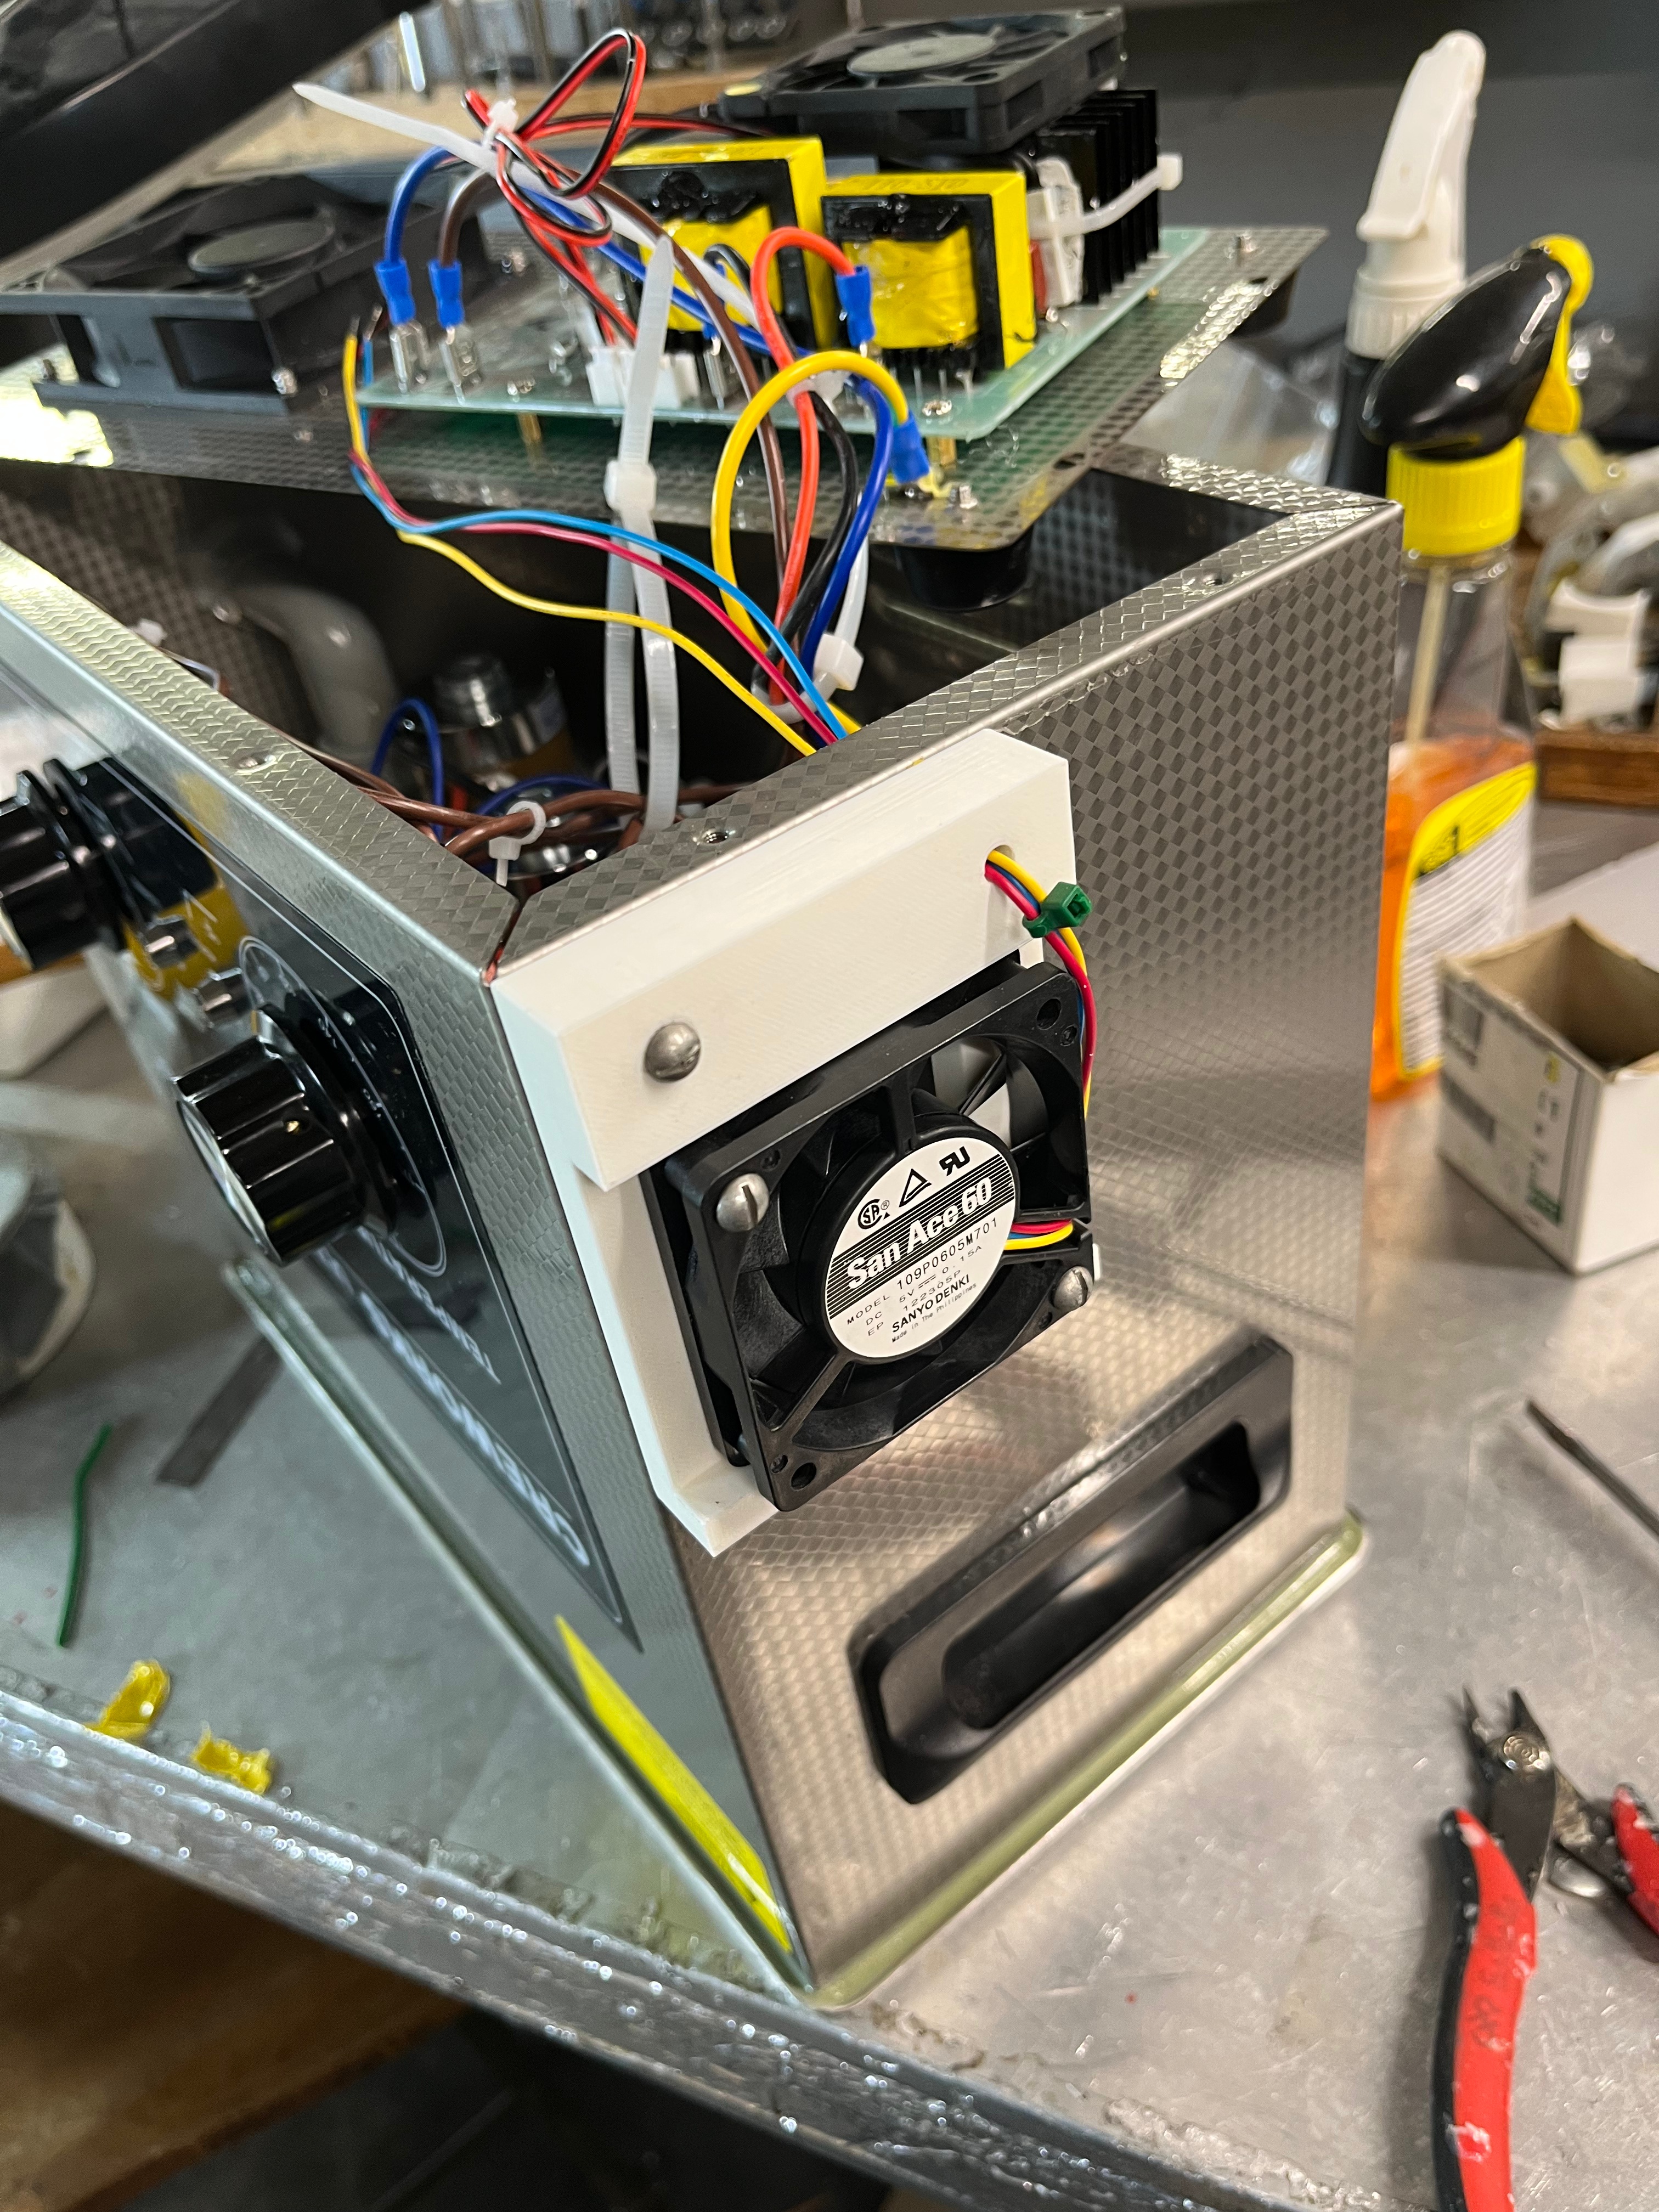
Machine Ventilation
Apr 2025 – Apr 2025
What
Designed and implemented a custom intake ventilation system to address recurring overheating in a production machine.
How
- Analyzed airflow limitations contributing to premature machine failure
- Engineered a fan-based intake system that activates only during machine operation to improve cooling efficiency
- Drilled into the stainless-steel frame and designed a custom mounting solution
- 3D printed a precision-fit bracket to securely mount the fan and ensure long-term stability
- Directed airflow toward internal components most susceptible to thermal stress
Result
- Potential to extend machine lifespan and reduce six-month repair/replacement cycles
- Improved internal airflow and temperature regulation
- System currently operating in production for performance validation

OMEGA Wire Press
Mar 2025 – Apr 2025
What
Led the redesign of a coil finishing process to support high-volume production of bent wires for a large manufacturing order.
How
- Evaluated existing 90-degree wire bending methods and identified scalability limitations
- Reviewed the full coil finishing workflow with engineering and production teams
- Proposed an omega-shaped wire bend to enable faster forming, finishing, and cutting
- Designed and built a press-style jig inspired by cookie-cutter manufacturing
- Conducted cost and material waste analysis to validate production viability
Result
- Enabled efficient production of 20,000+ units with improved ergonomics and throughput
- Reduced coil finishing time from 5 minutes to 3 minutes per unit
- Eliminated the primary production bottleneck in a process unchanged for over 15 years
-


Final Bending Jig


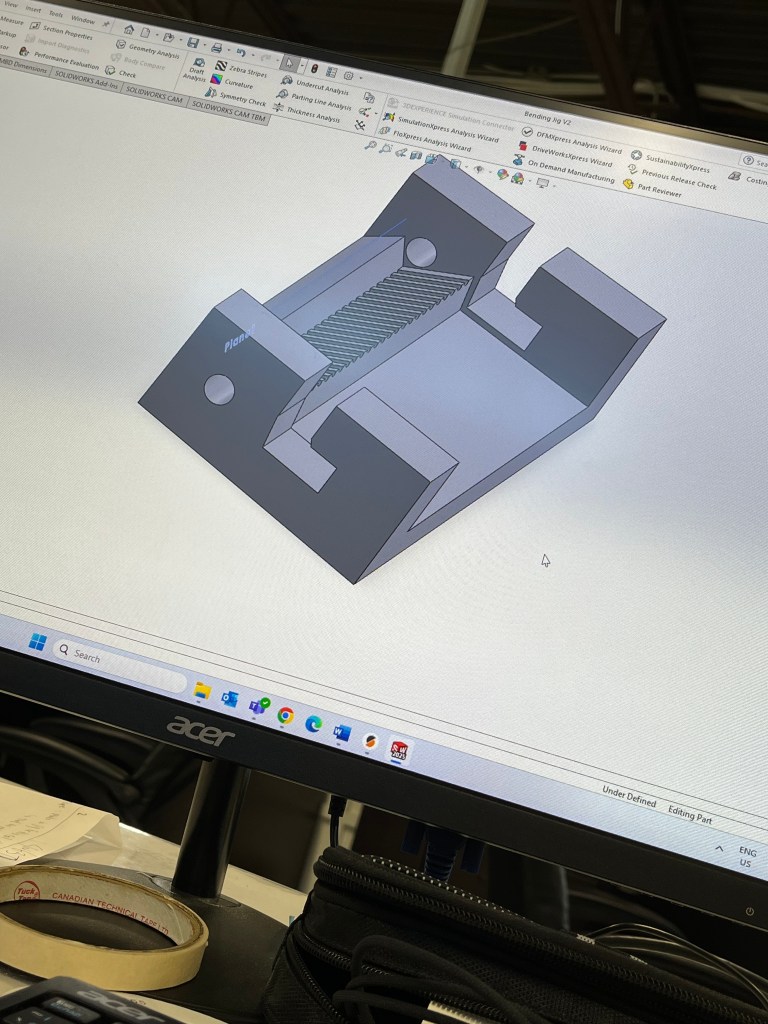

First Iterations of the 90-degree Bending Jig and First Attempt at Omega-Shaped Bending Jig
Spiral Coil Jigs
Mar 2025 – Mar 2025
What
Developed a production process and tooling to form a precision wire winding for a medical machine application.
How
- Interpreted customer-supplied drawings with extremely tight tolerances
- Rapidly prototyped multiple jig designs within a one-week timeline
- Evaluated bend accuracy and repeatability across different configurations
- Finalized a three-jig forming system to achieve the required geometry
- Revised original drawings to adjust tolerances for manufacturability while preserving function
- Submitted updated drawings to the customer for review and approval
Result
- Balanced precision, efficiency, and manufacturability under a tight deadline
- Established the standard production method for this component
- Achieved consistent, repeatable wire geometry within medical-device requirements

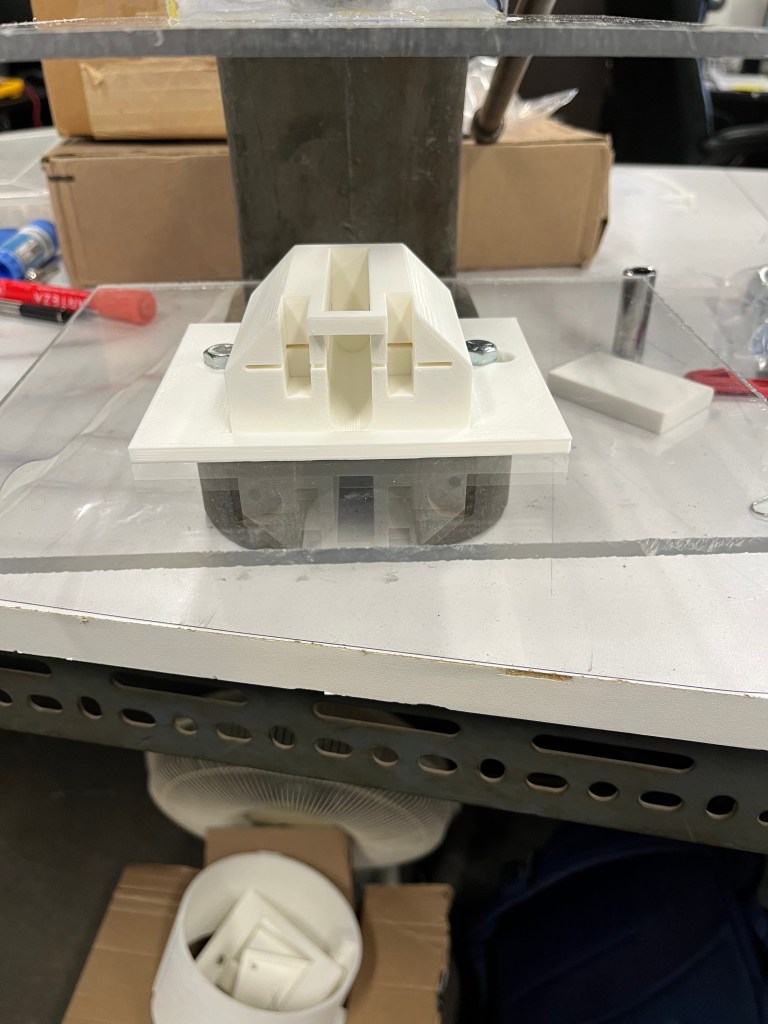
Conveyor Belt Tensioner
Mar 2025 – Mar 2025
What
Designed and built a belt tensioner for a custom conveyor system used in the manufacturing of a specialized part.
How
- Designed the tensioner and full assembly in SOLIDWORKS
- Salvaged linear ball bearings and steel rods from decommissioned equipment to reduce cost
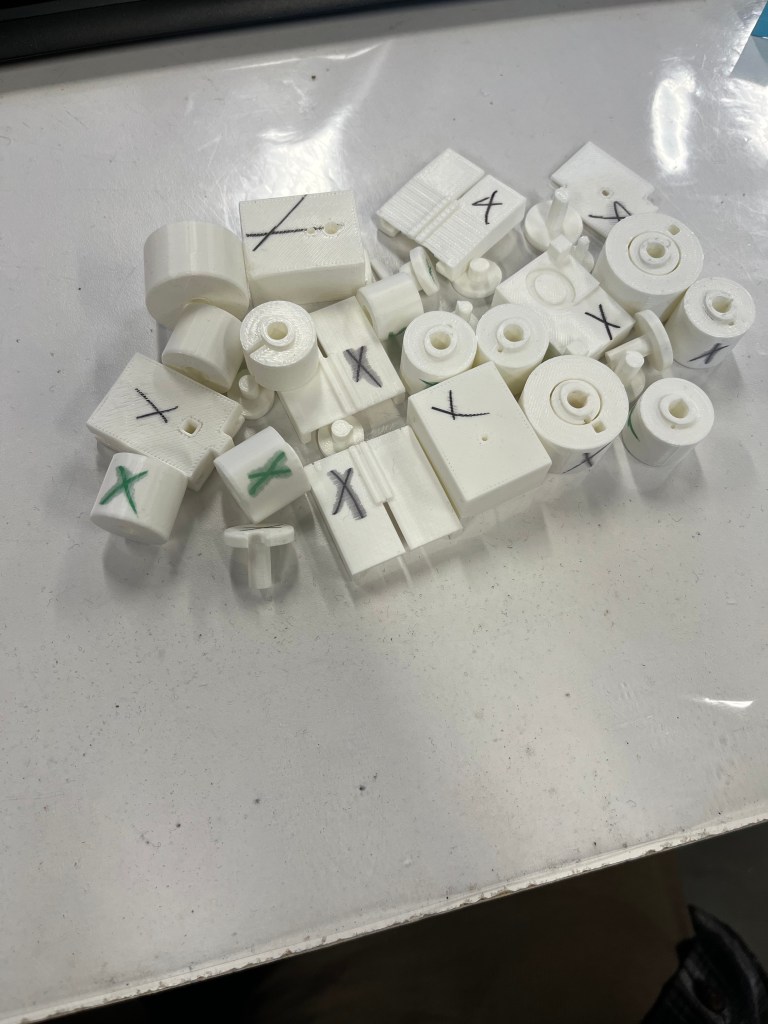
- 3D printed prototype components to validate fit, motion, and alignment
- Reviewed the design with a senior engineer before finalizing
- Delivered final CAD files to a machinist for future fabrication
Result
- Enabled smooth belt tracking and readiness for long-term production use
- Produced a cost-effective, robust belt tensioning solution


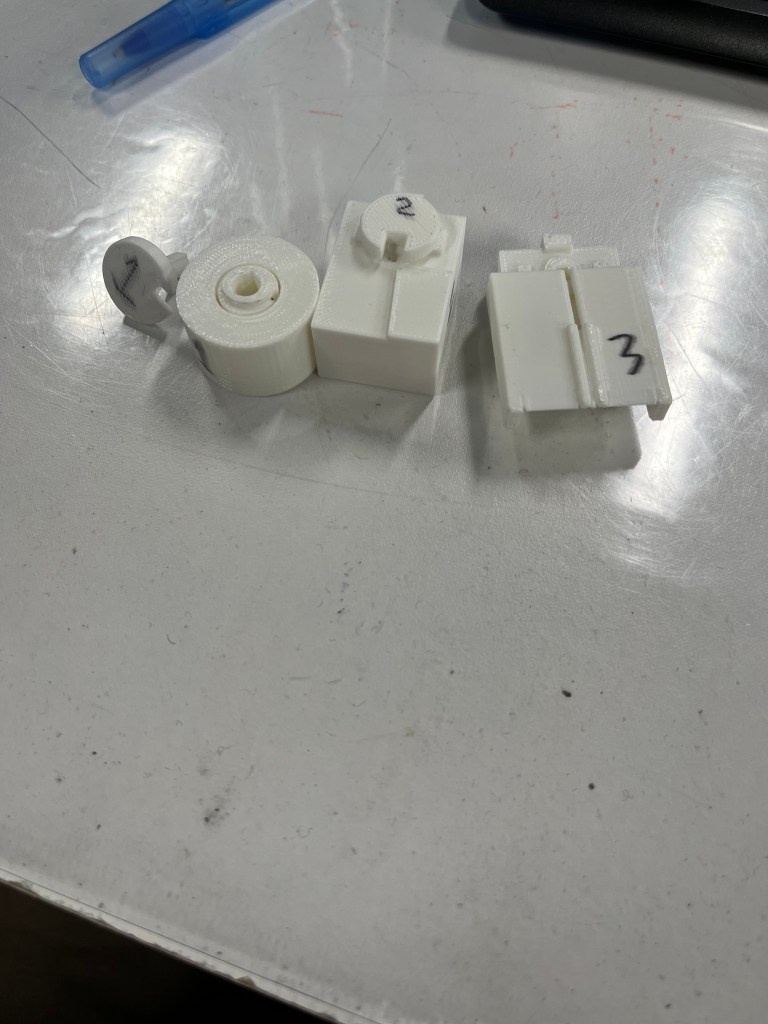
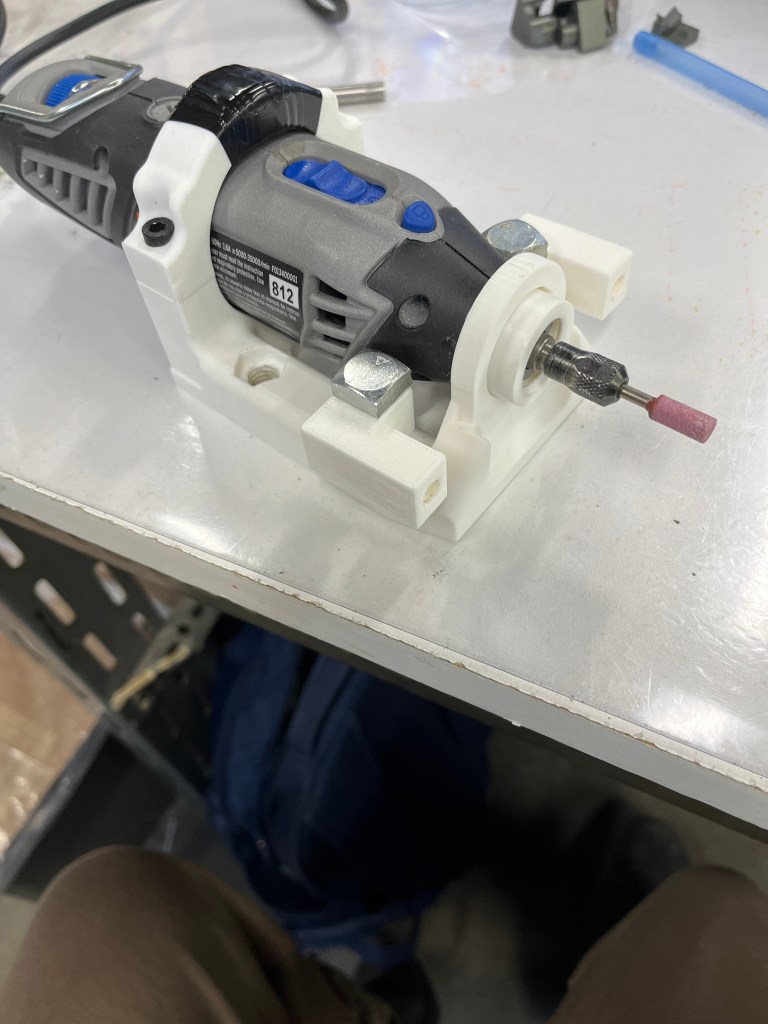
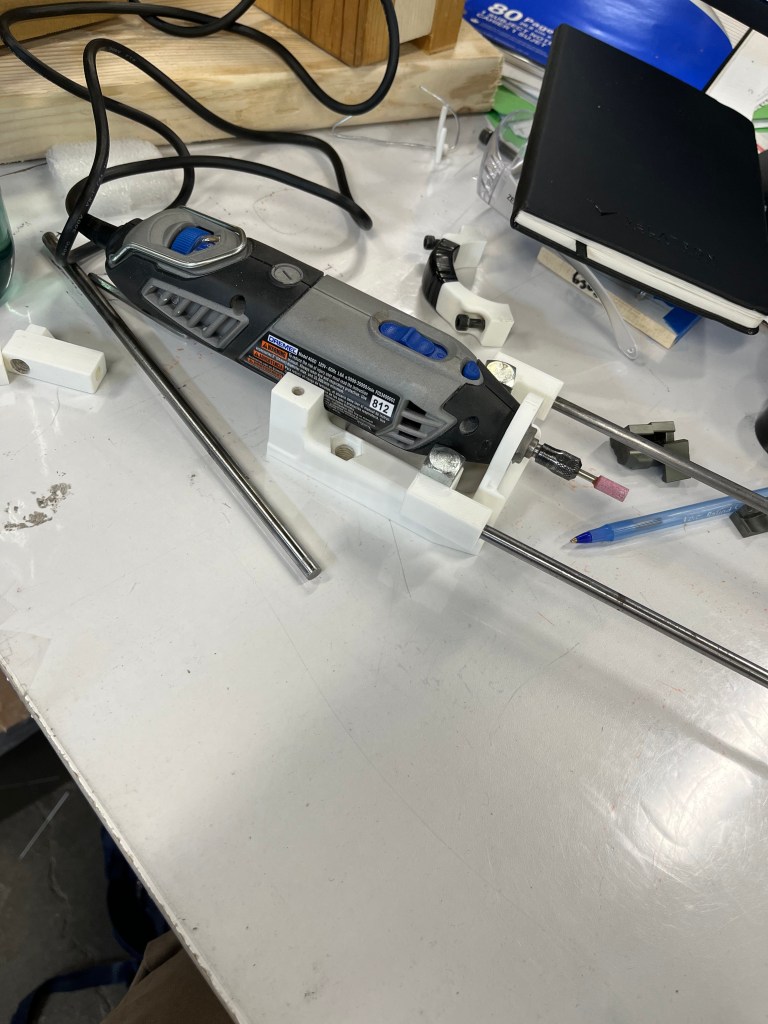
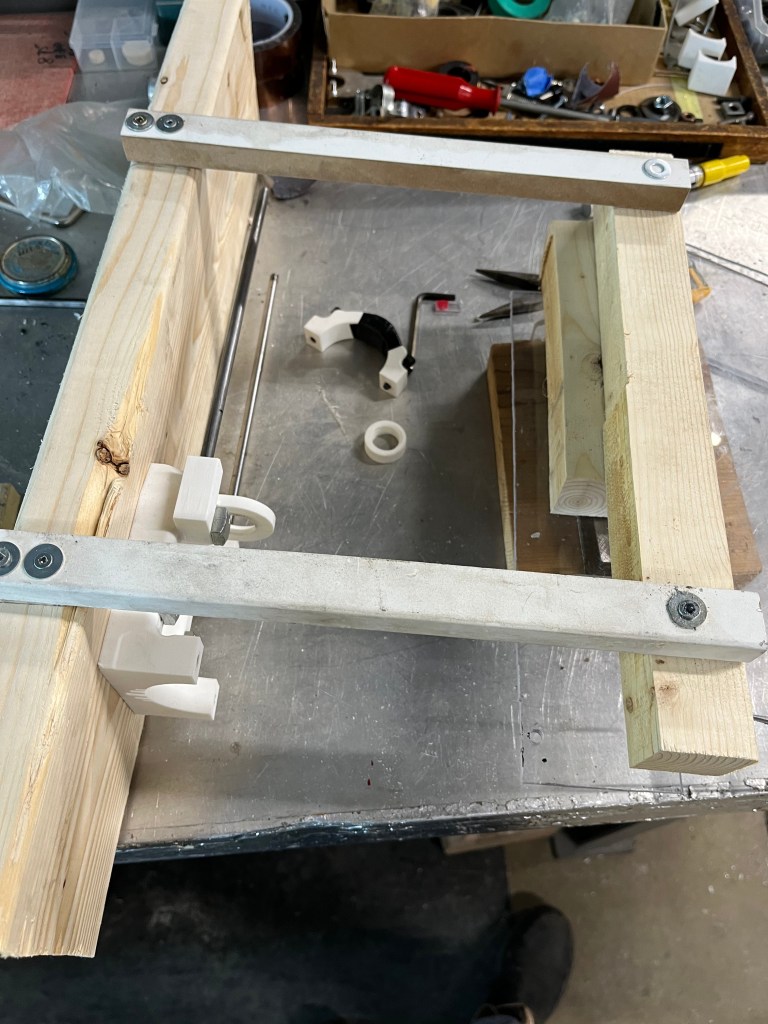
Horizontal Dremel Grinder
Feb 2025 – Mar 2025
What
Prototyped a method to precisely remove excess tinned wire flush to a part surface within extremely tight tolerances.
How
- Evaluated conventional cutting methods and ruled them out due to risk of component damage
- Collaborated with the engineering team to identify grinding as the most viable approach
- Designed a custom jig to control wire feed depth and stop position before surface contact
- Integrated a precision rotary tool (Dremel-style) to achieve sub-millimeter accuracy
- Iterated over multiple prototypes using 3D-printed parts, scrap wood, and repurposed materials
Result
- Documented limitations and proposed design improvements for future high-volume production
- Achieved reliable wire removal within ±0.1 mm tolerance for sample production
- Delivered a low-cost, functional setup suitable for producing initial customer parts


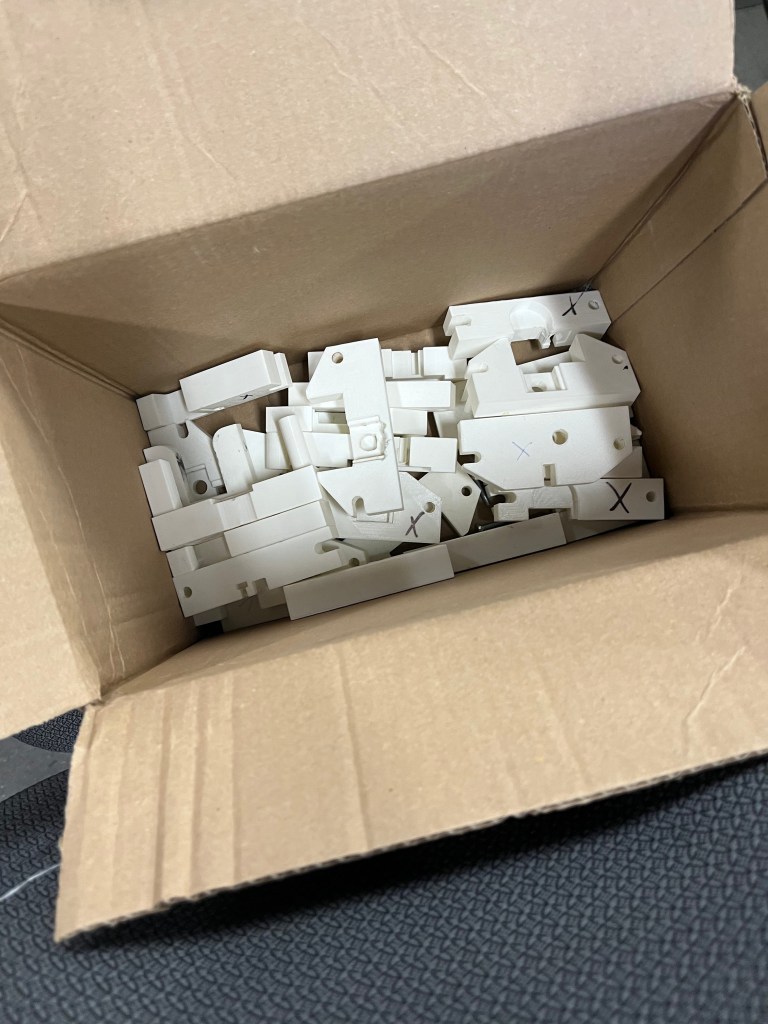
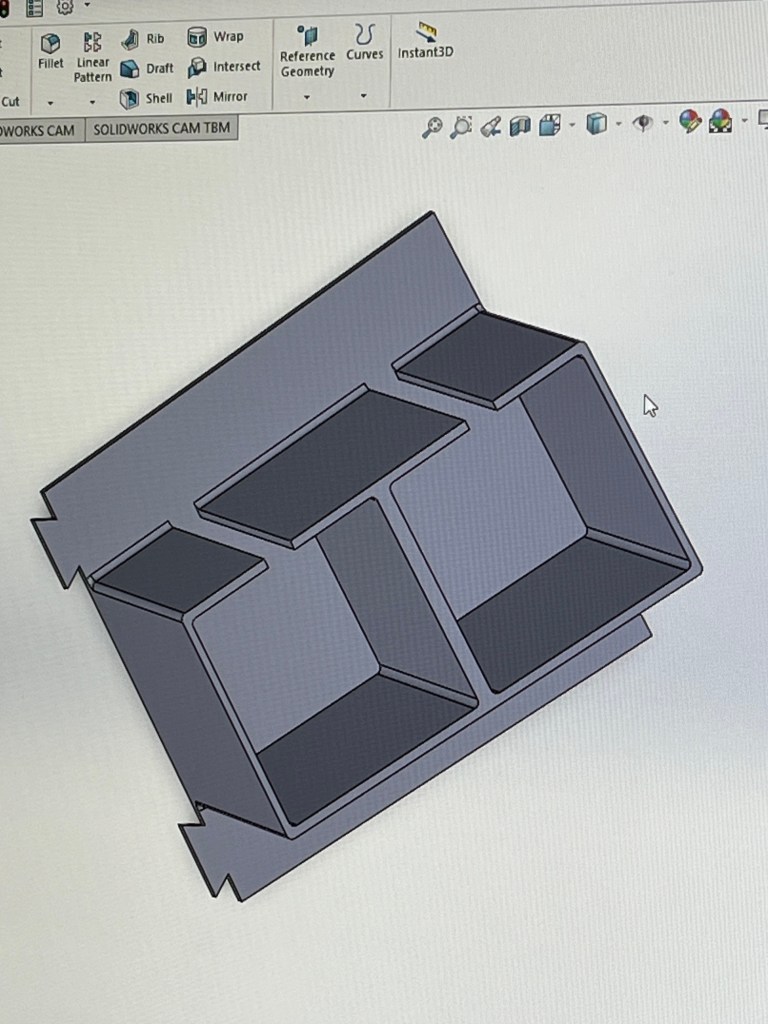
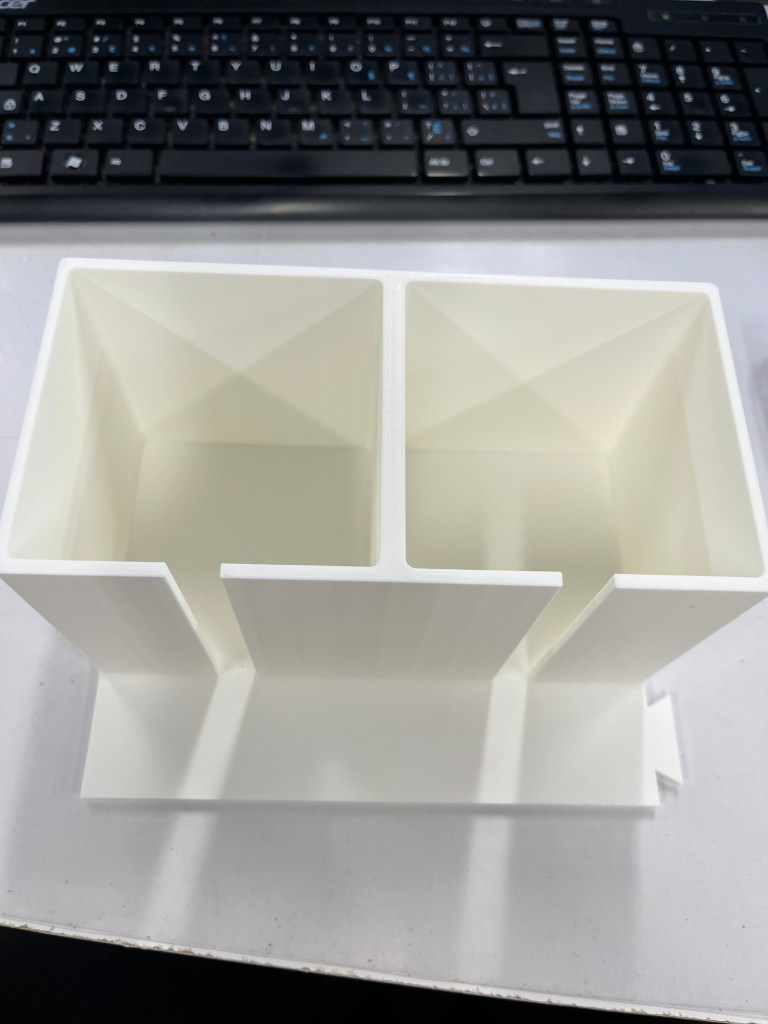
Chemical Cup Holder
Jan 2025 – Jan 2025
What
Designed a spill-prevention holder to stabilize chemical cups used at a high-temperature soldering workstation.
How
- Assessed spill risks caused by confined workspace geometry and cup instability
- Designed a wide-base holder to securely capture and support the chemical cups
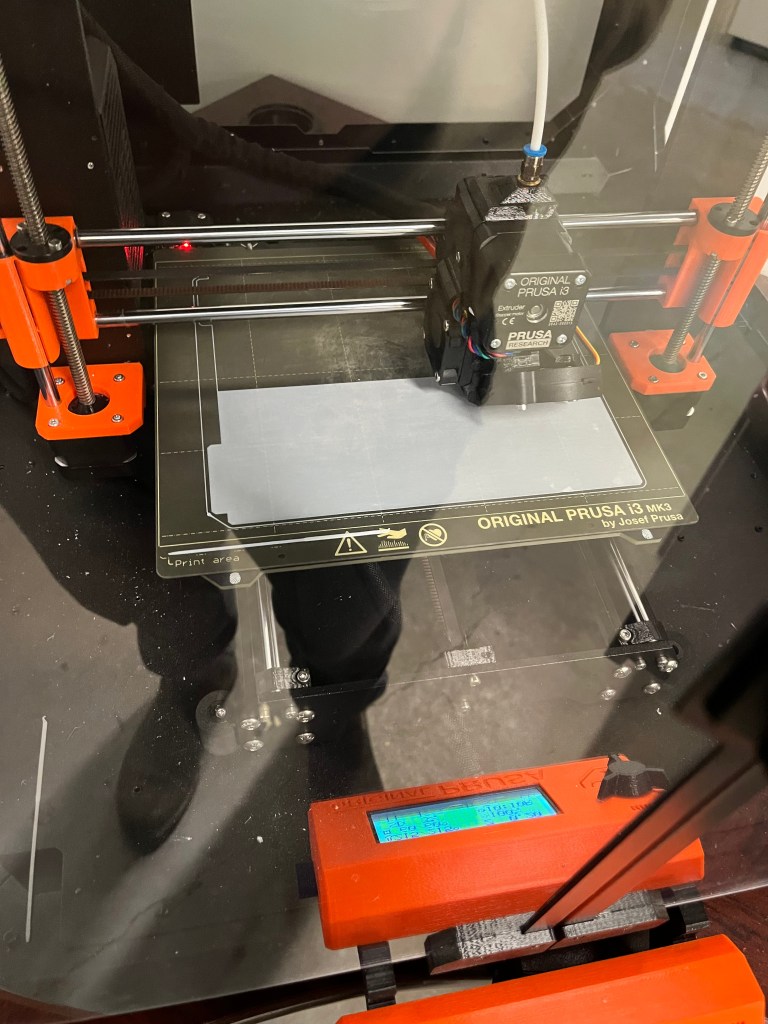
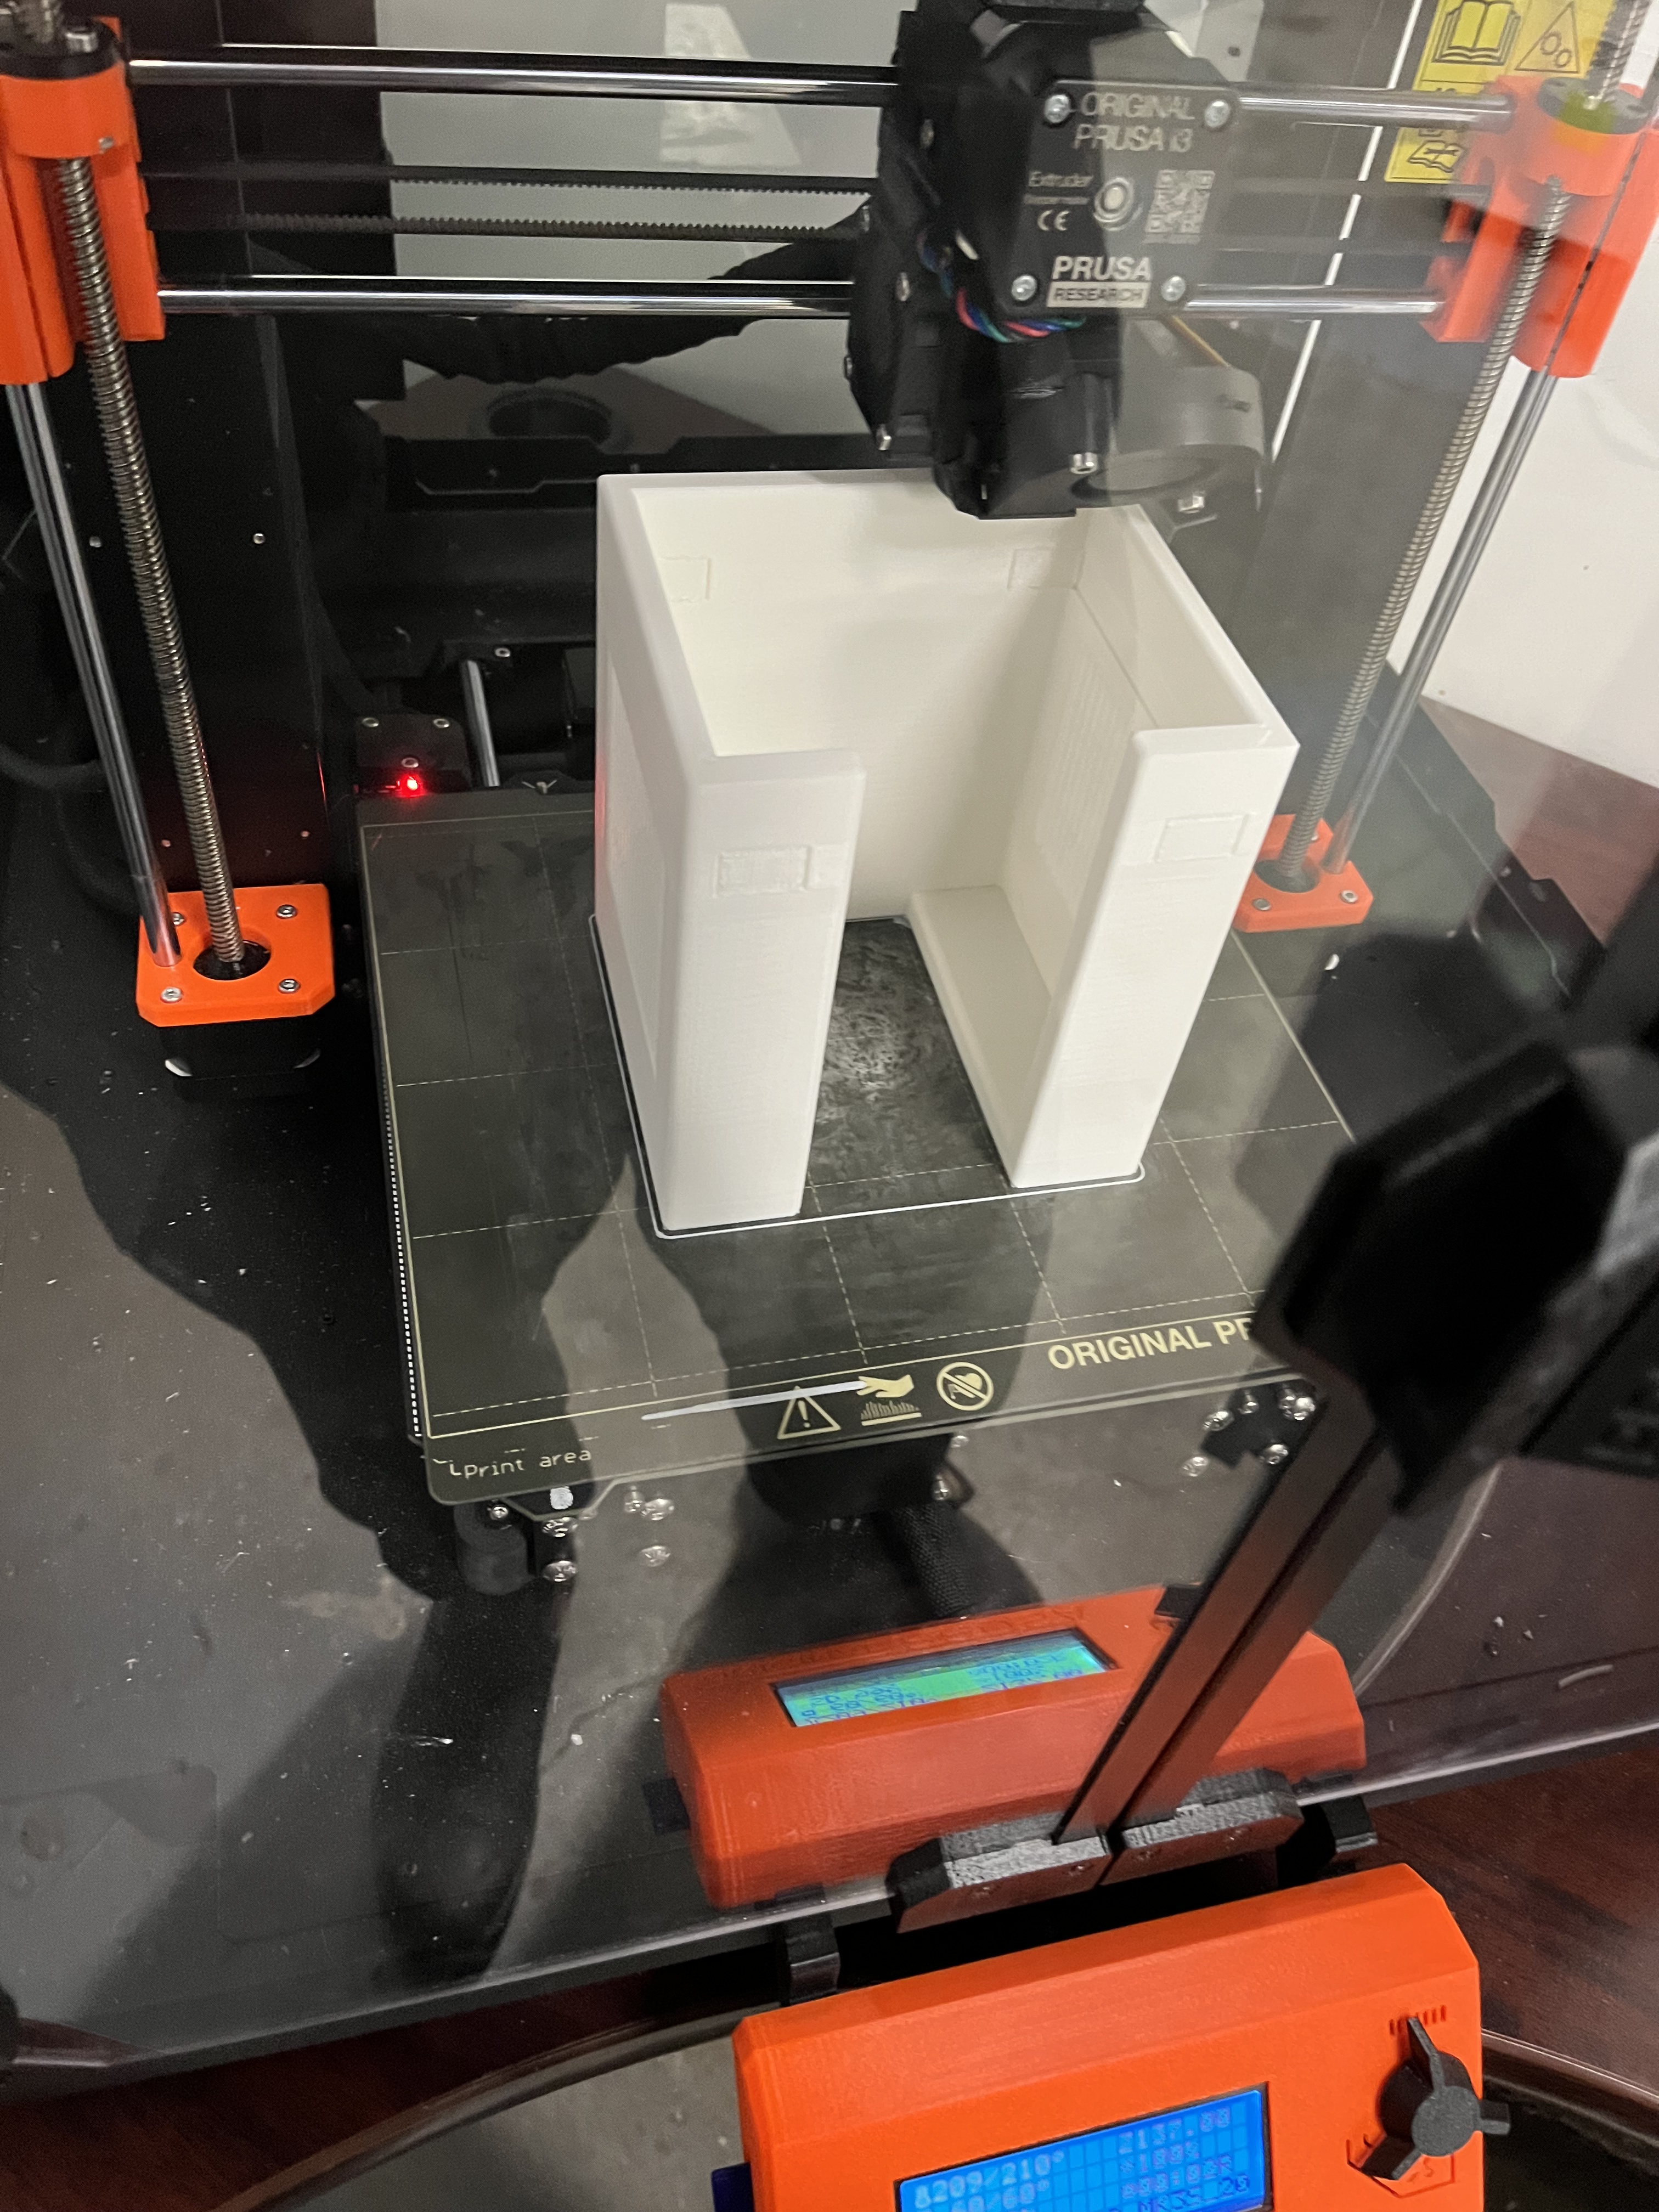
- 3D printed the holder in PLA for rapid deployment
- Split the design into one-cup and two-cup modules due to build-plate size constraints
- Integrated a puzzle-style joint to allow the modules to interlock securely
Result
- Delivered a low-cost, quickly deployable safety solution
- Eliminated chemical spills at the workstation
- Improved operator safety and confidence when handling chemicals

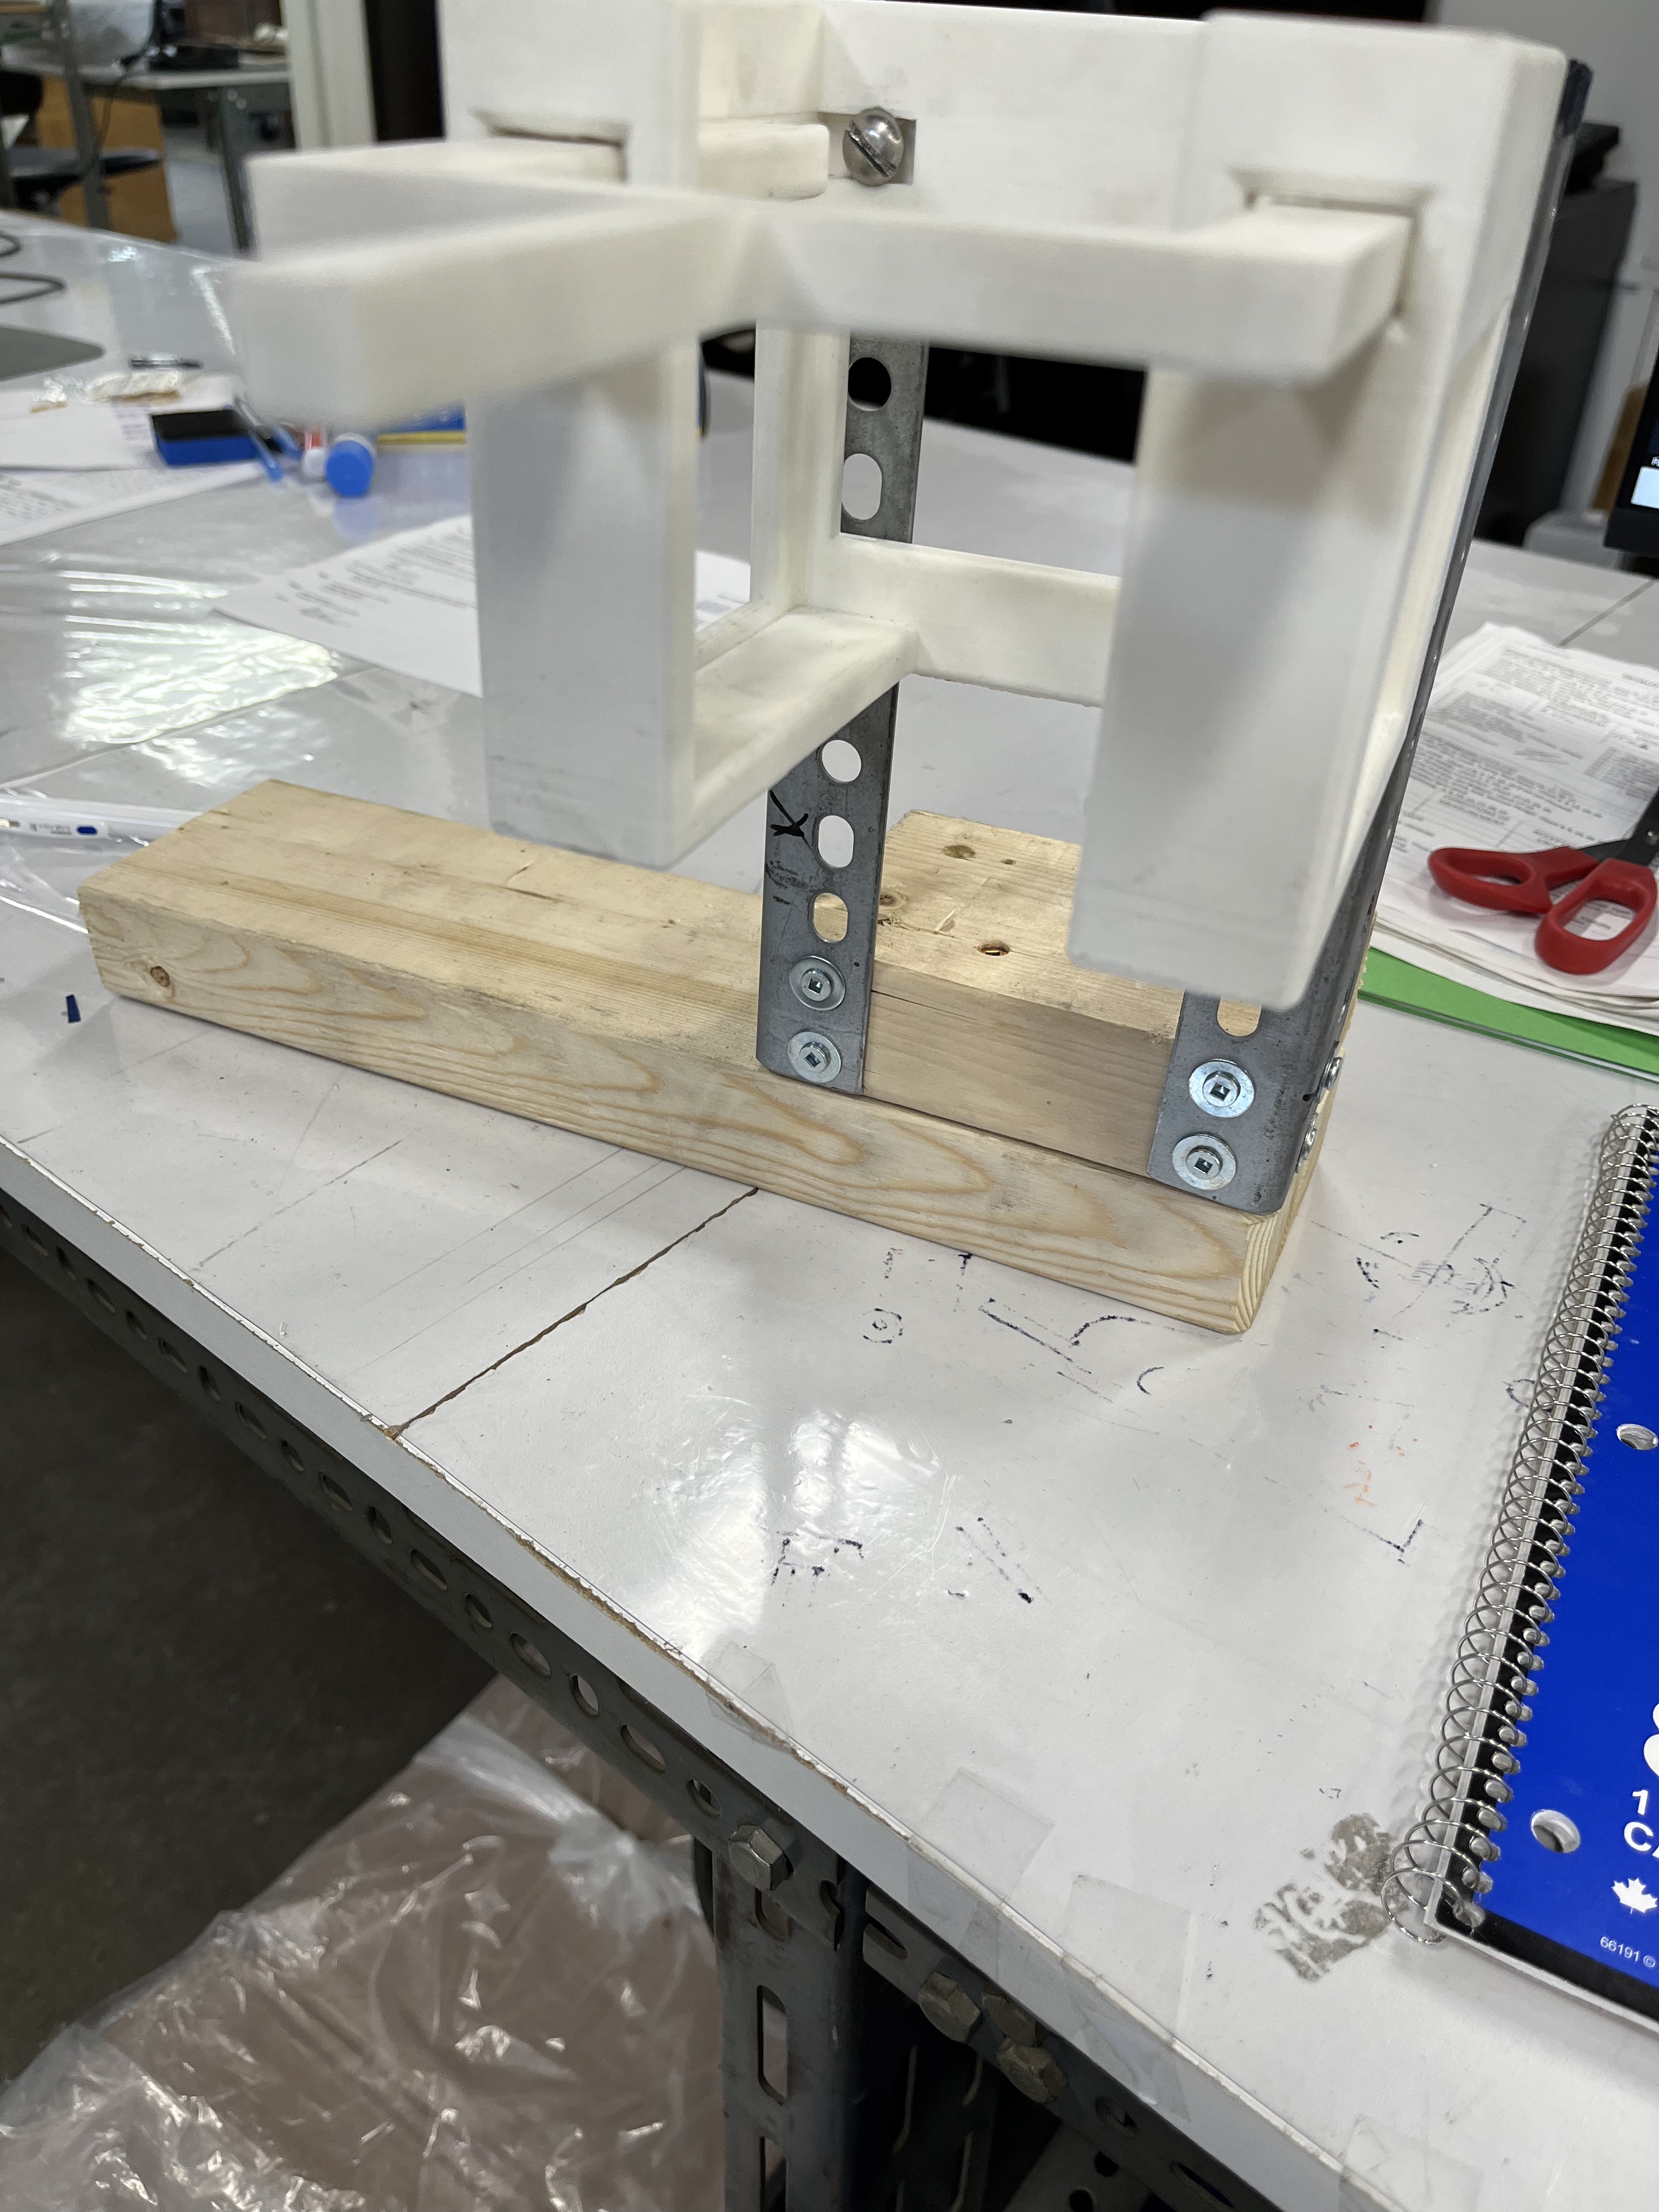
Transformer Wrapping Jig
Jan 2025 – Feb 2025
What
Designed a custom jig to assist production workers in wrapping wire around transformer cores accurately and efficiently.
How
- Designed a jig that elevates and secures the core, enabling smooth wire threading from both the top and bottom
- Integrated a telescopic end holder to anchor wire at a precise distance for consistent length control
- Iterated on multiple prototypes to resolve issues with holder stability and fork height
- Added adjustable levelers to accommodate multiple core sizes
- Fabricated components using 3D-printed PLA, repurposed materials, and scrap wood to minimize cost
Result
- Reduced wrapping time from 20 minutes to 15 minutes per unit
- Improved repeatability and ease of use for production workers
- Enhanced workflow efficiency for a time-sensitive transformer order
-
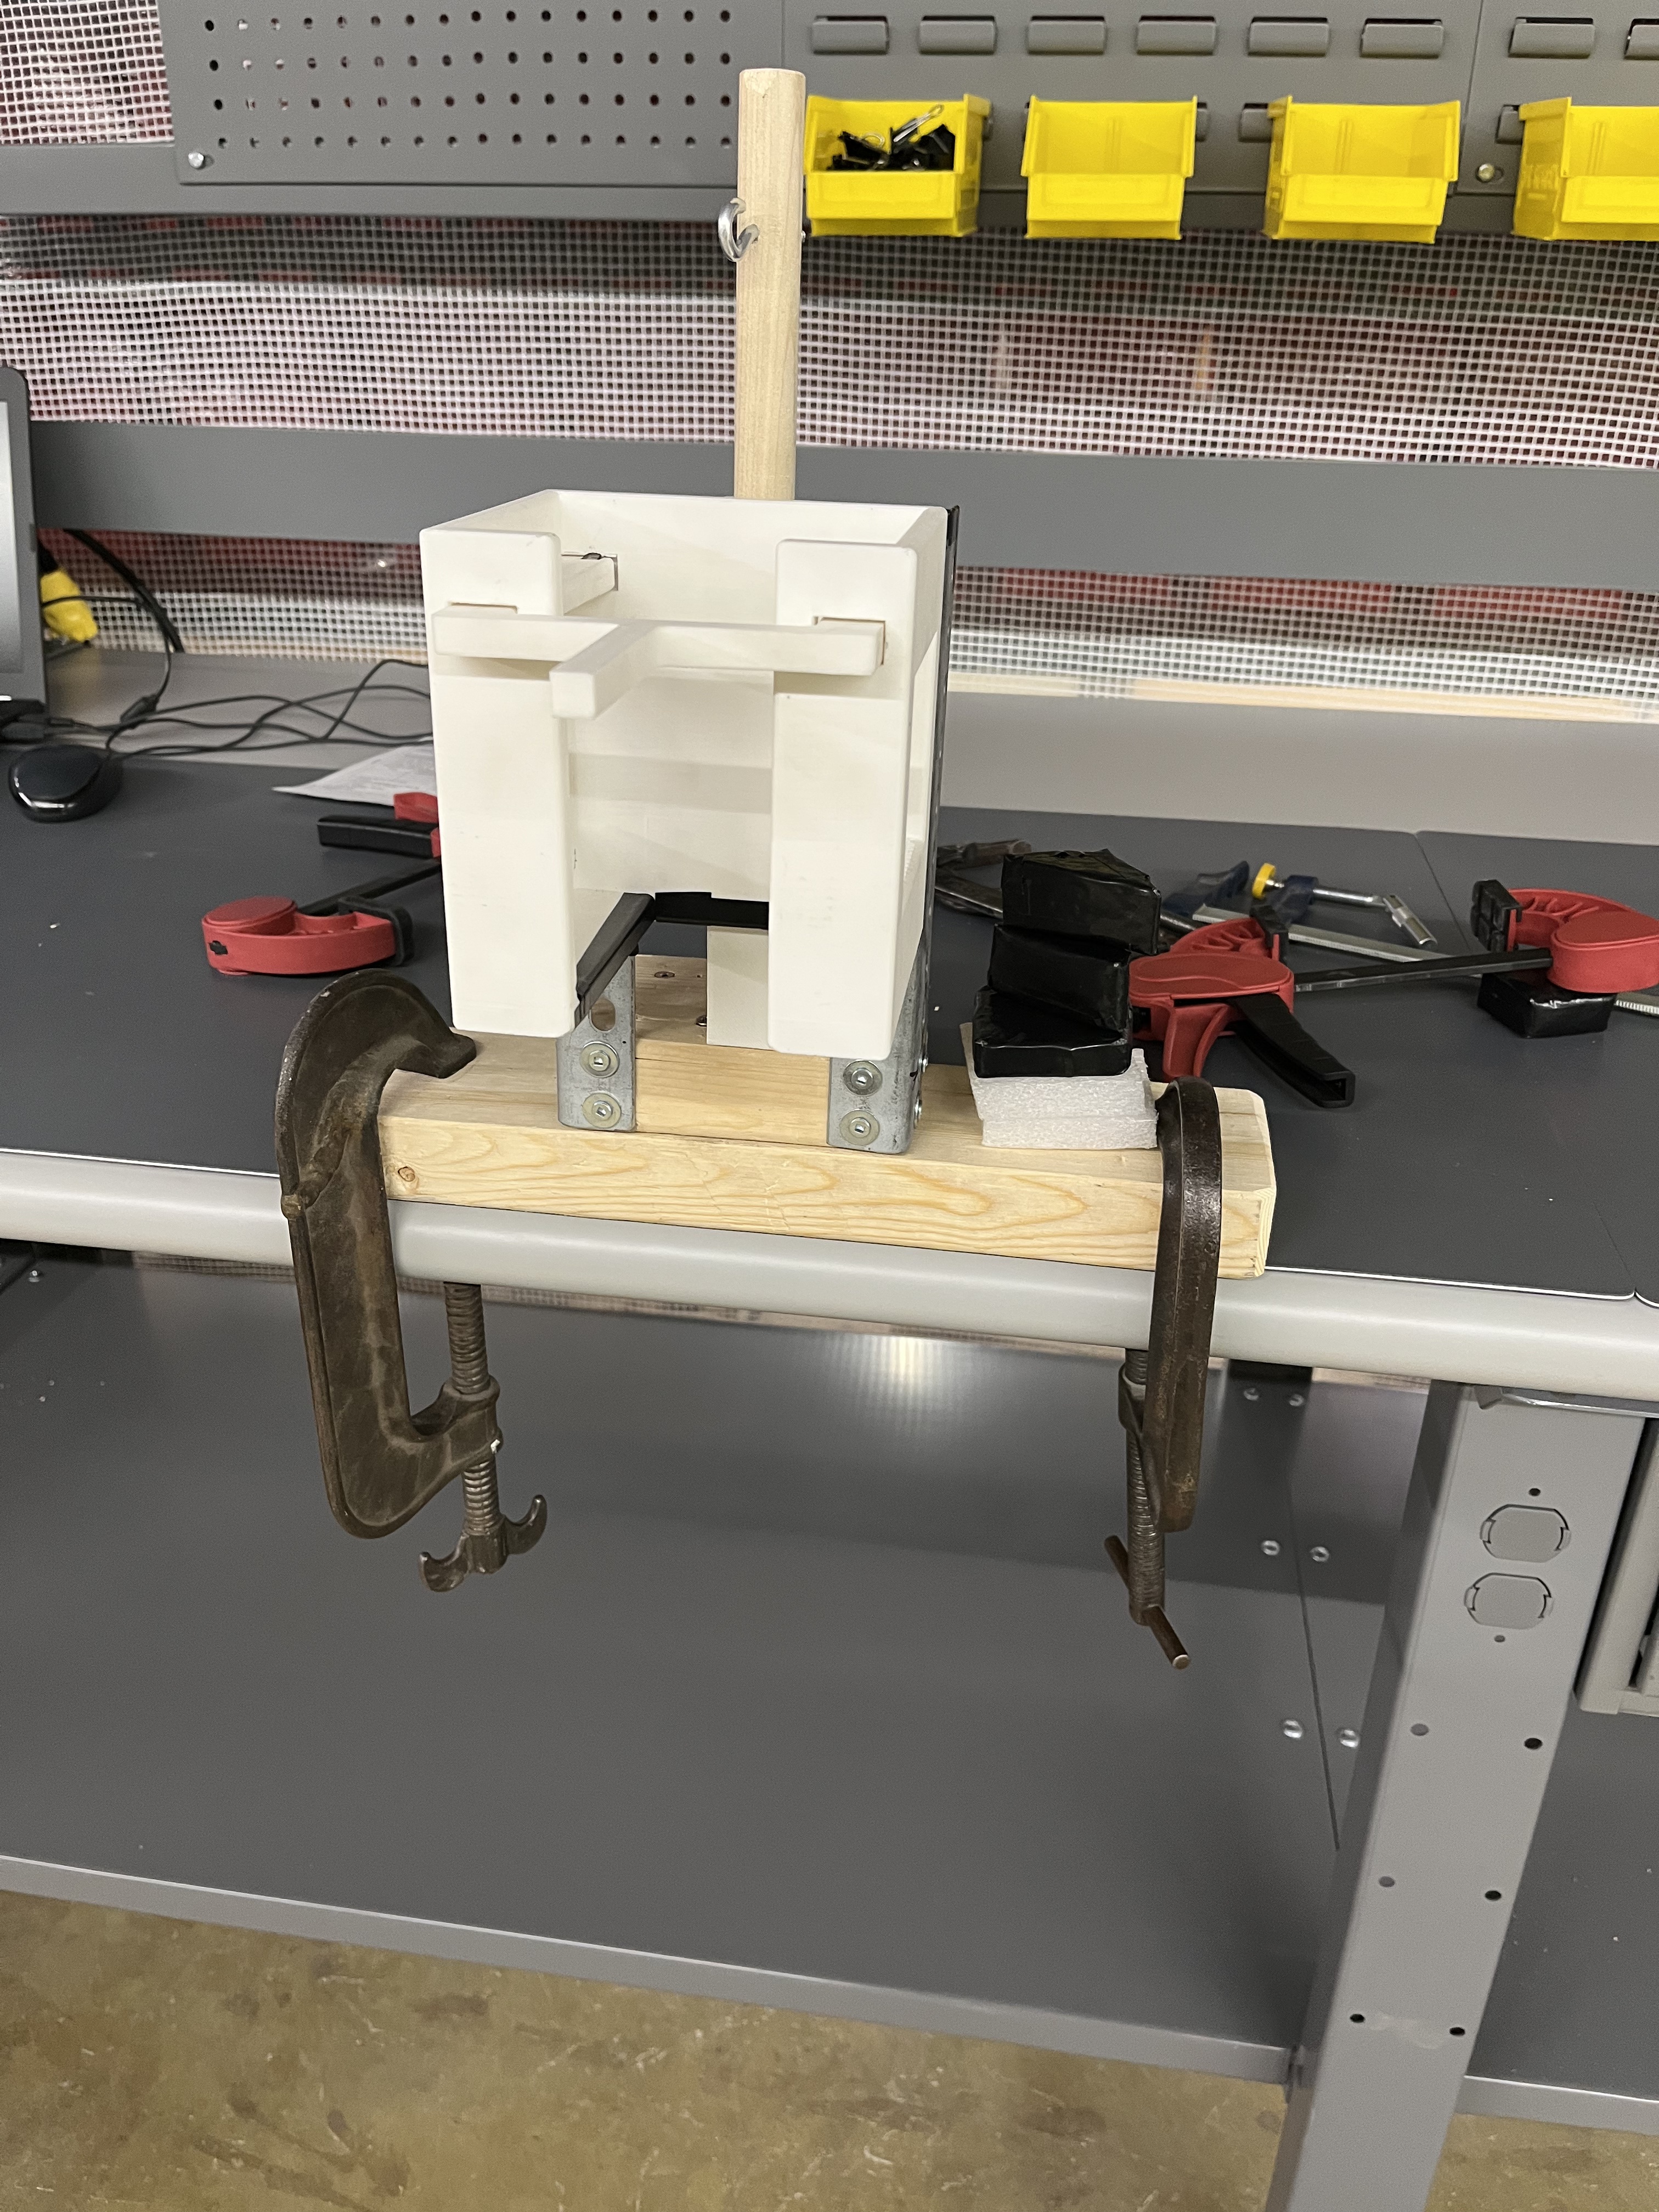


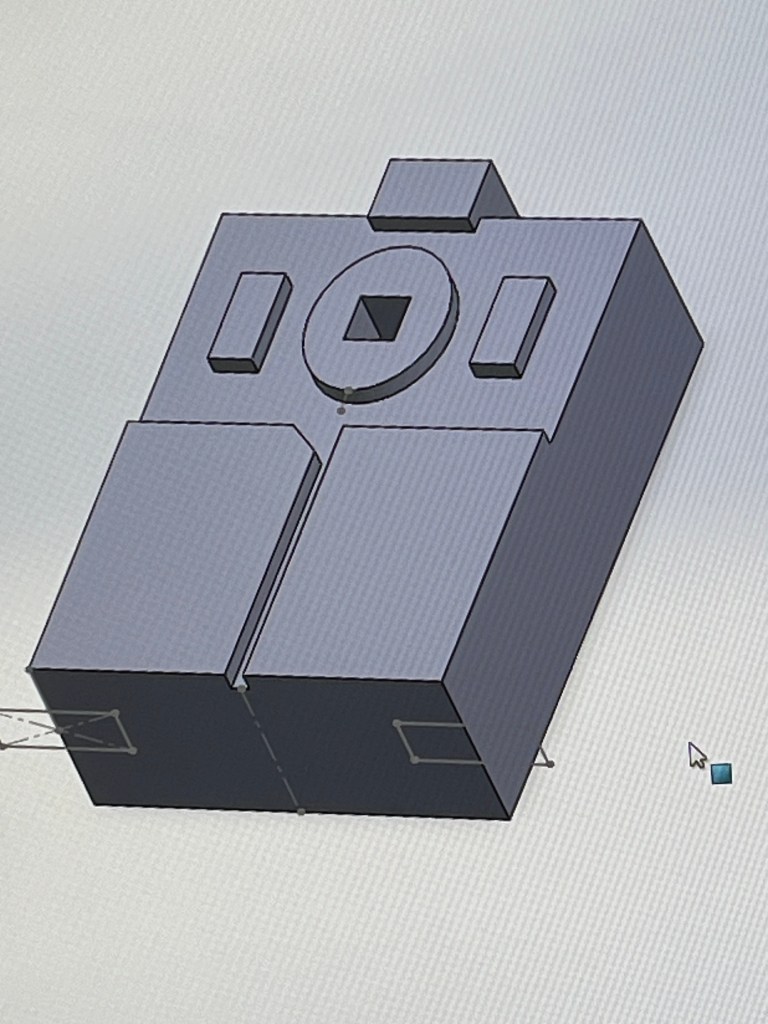
Final product


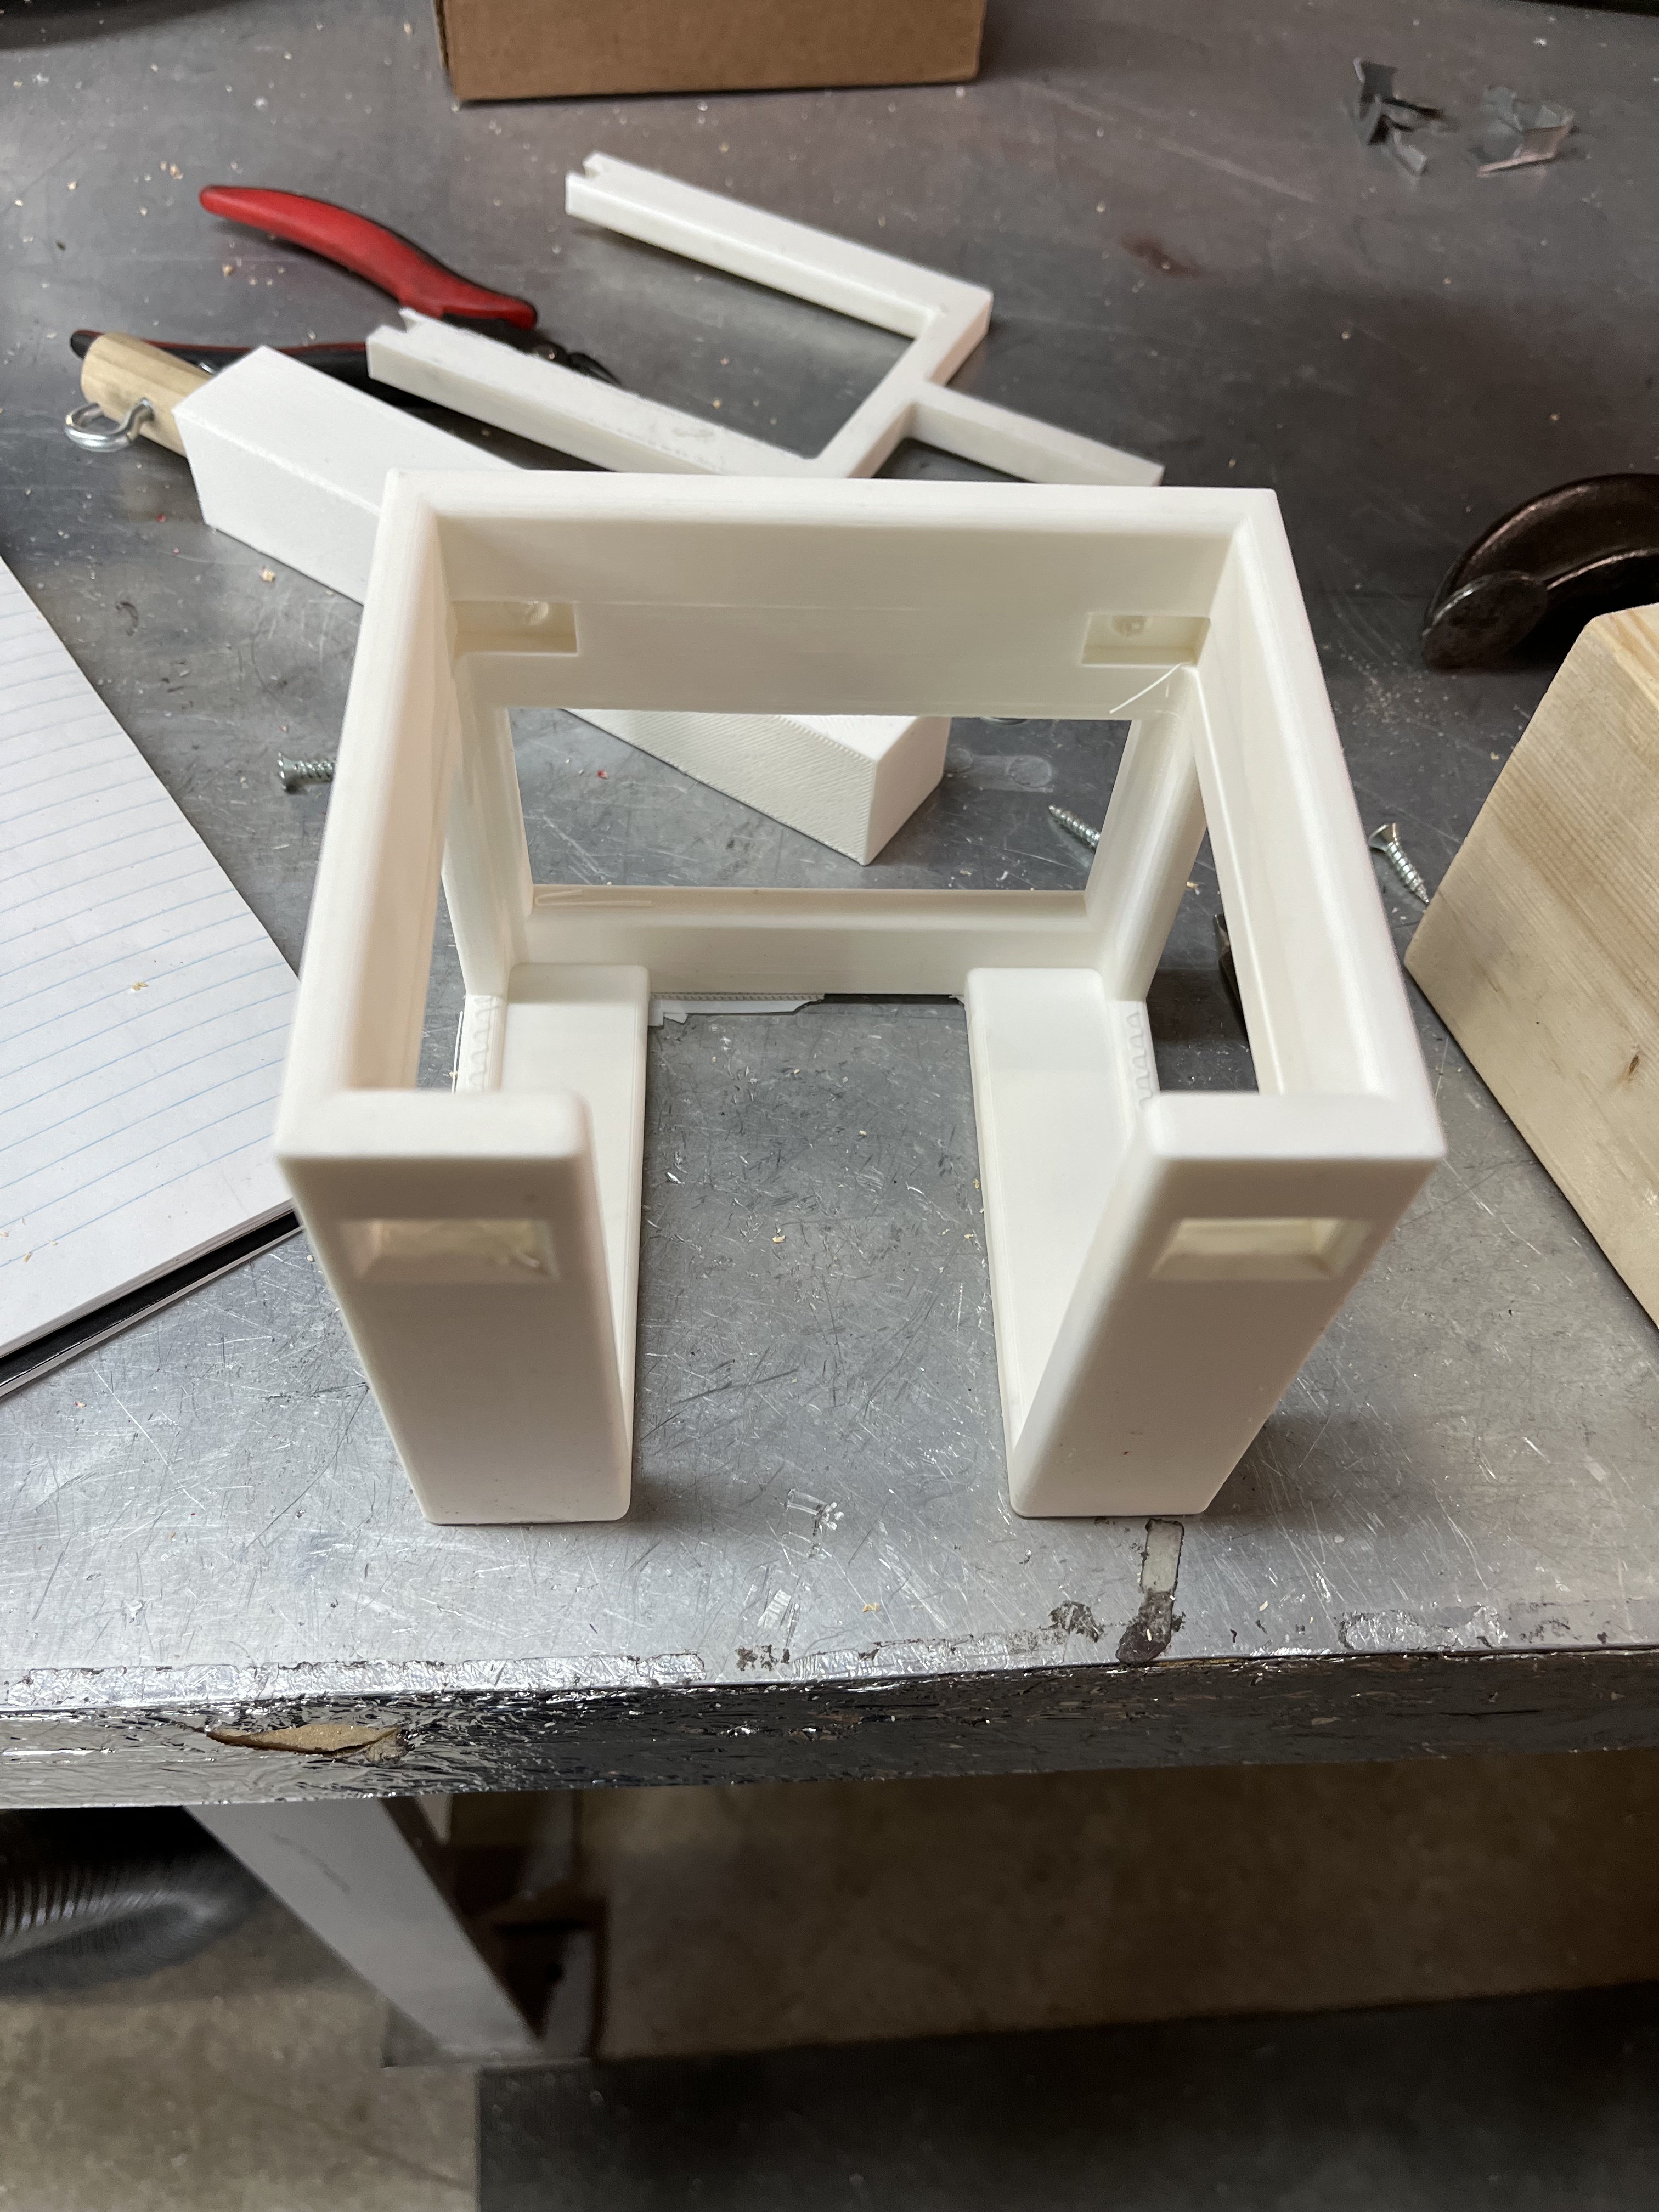

First iterations/prototypes for the jig
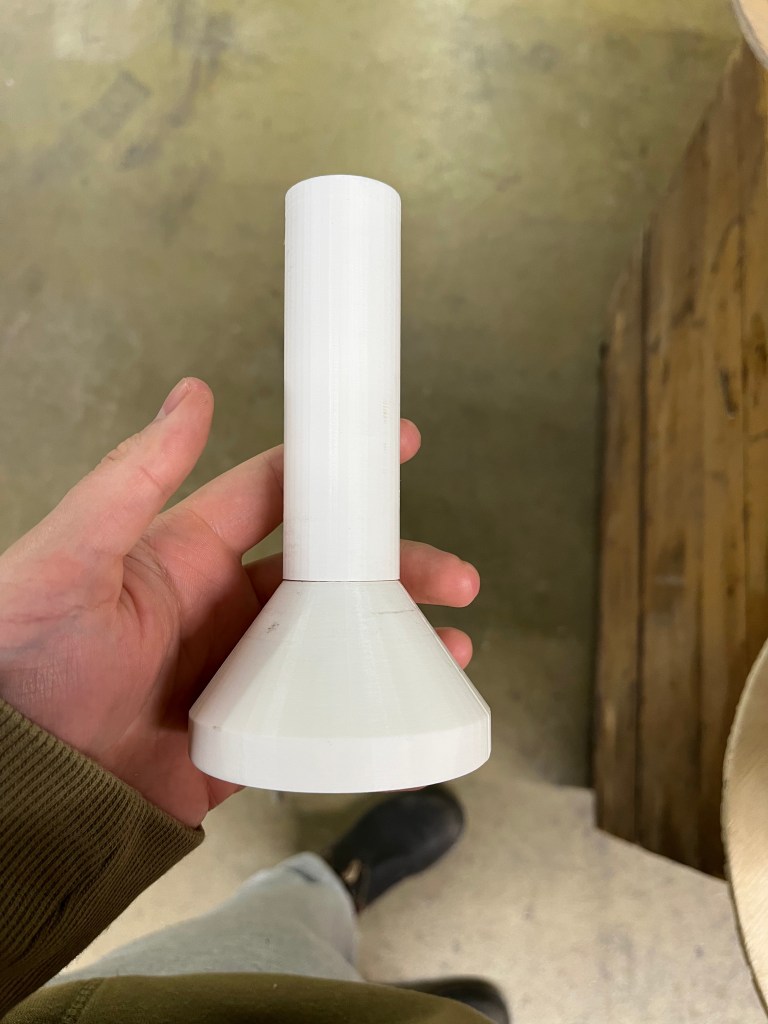
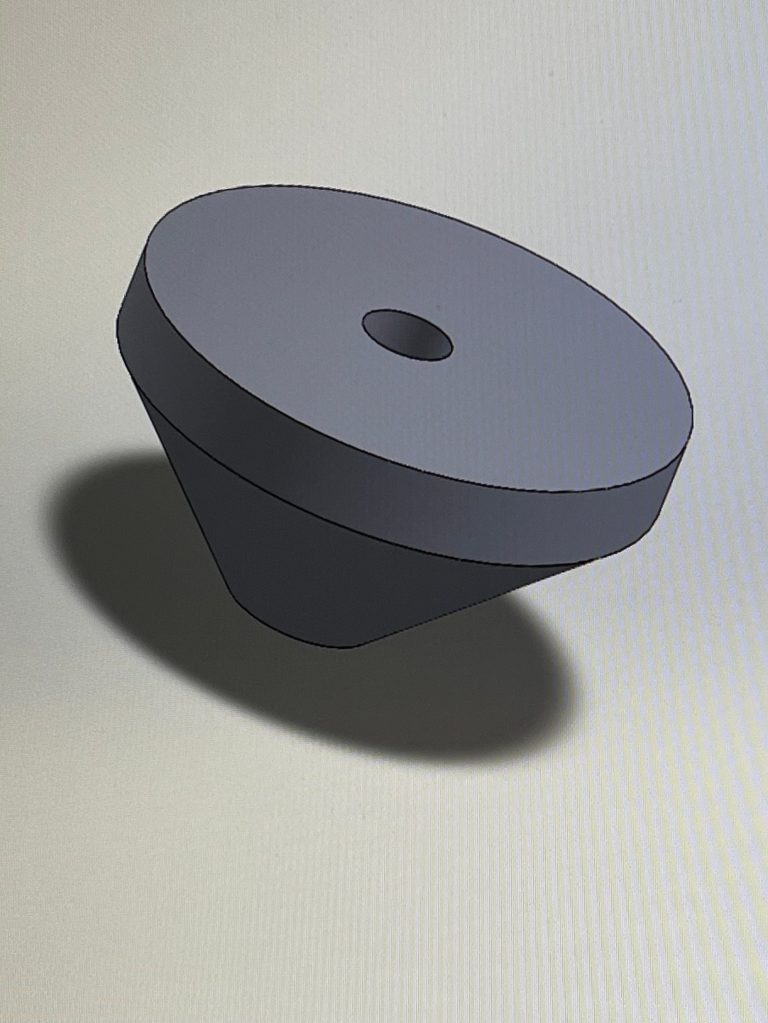
Spool Cap Tightener
Jan 2025 – Jan 2025
What
Designed a simple add-on to stabilize wire spools during unwinding and reduce excess tension in the wire-wrapping process.
How
- Identified spool movement as the source of inconsistent wire tension
- Designed a truncated cone tightener with internal threading to fit into the spool core
- Secured the spool directly to the turntable to prevent shaking and lateral movement
Result
- Created a reusable solution applicable to future wire unwinding and cutting tasks
- Eliminated spool shifting and uneven tension during unwinding
- Improved smoothness and consistency of wire feed


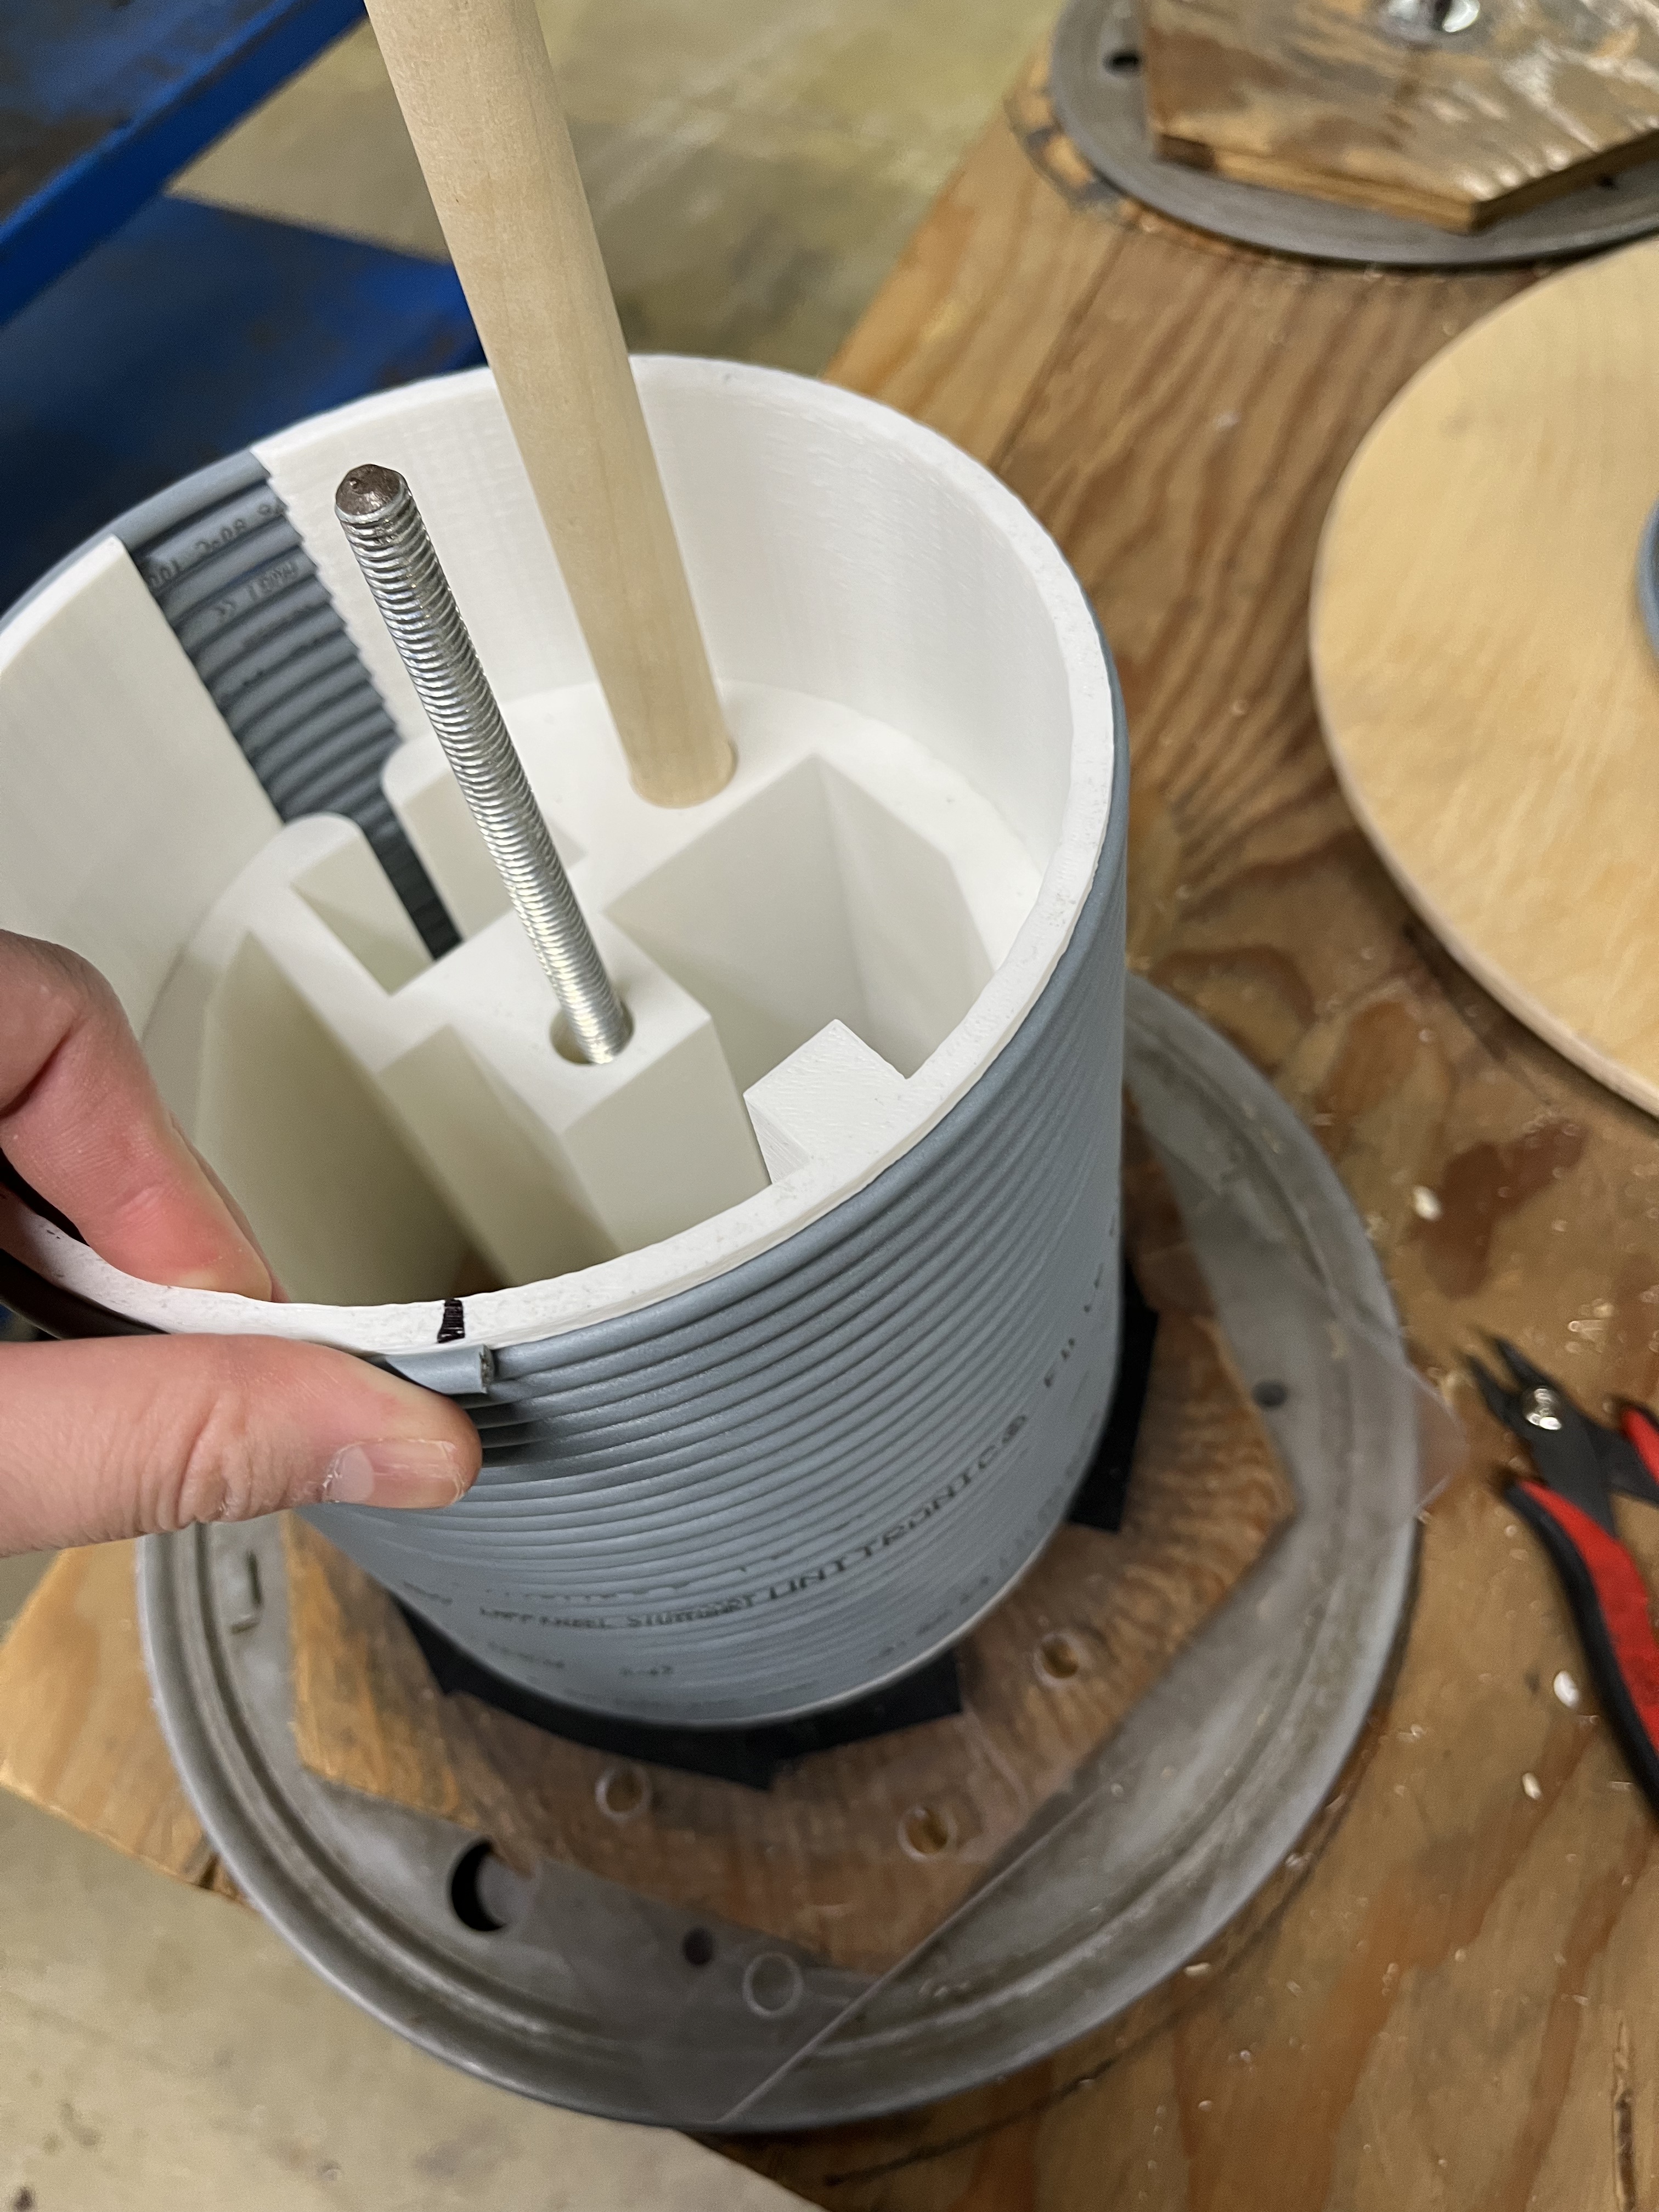
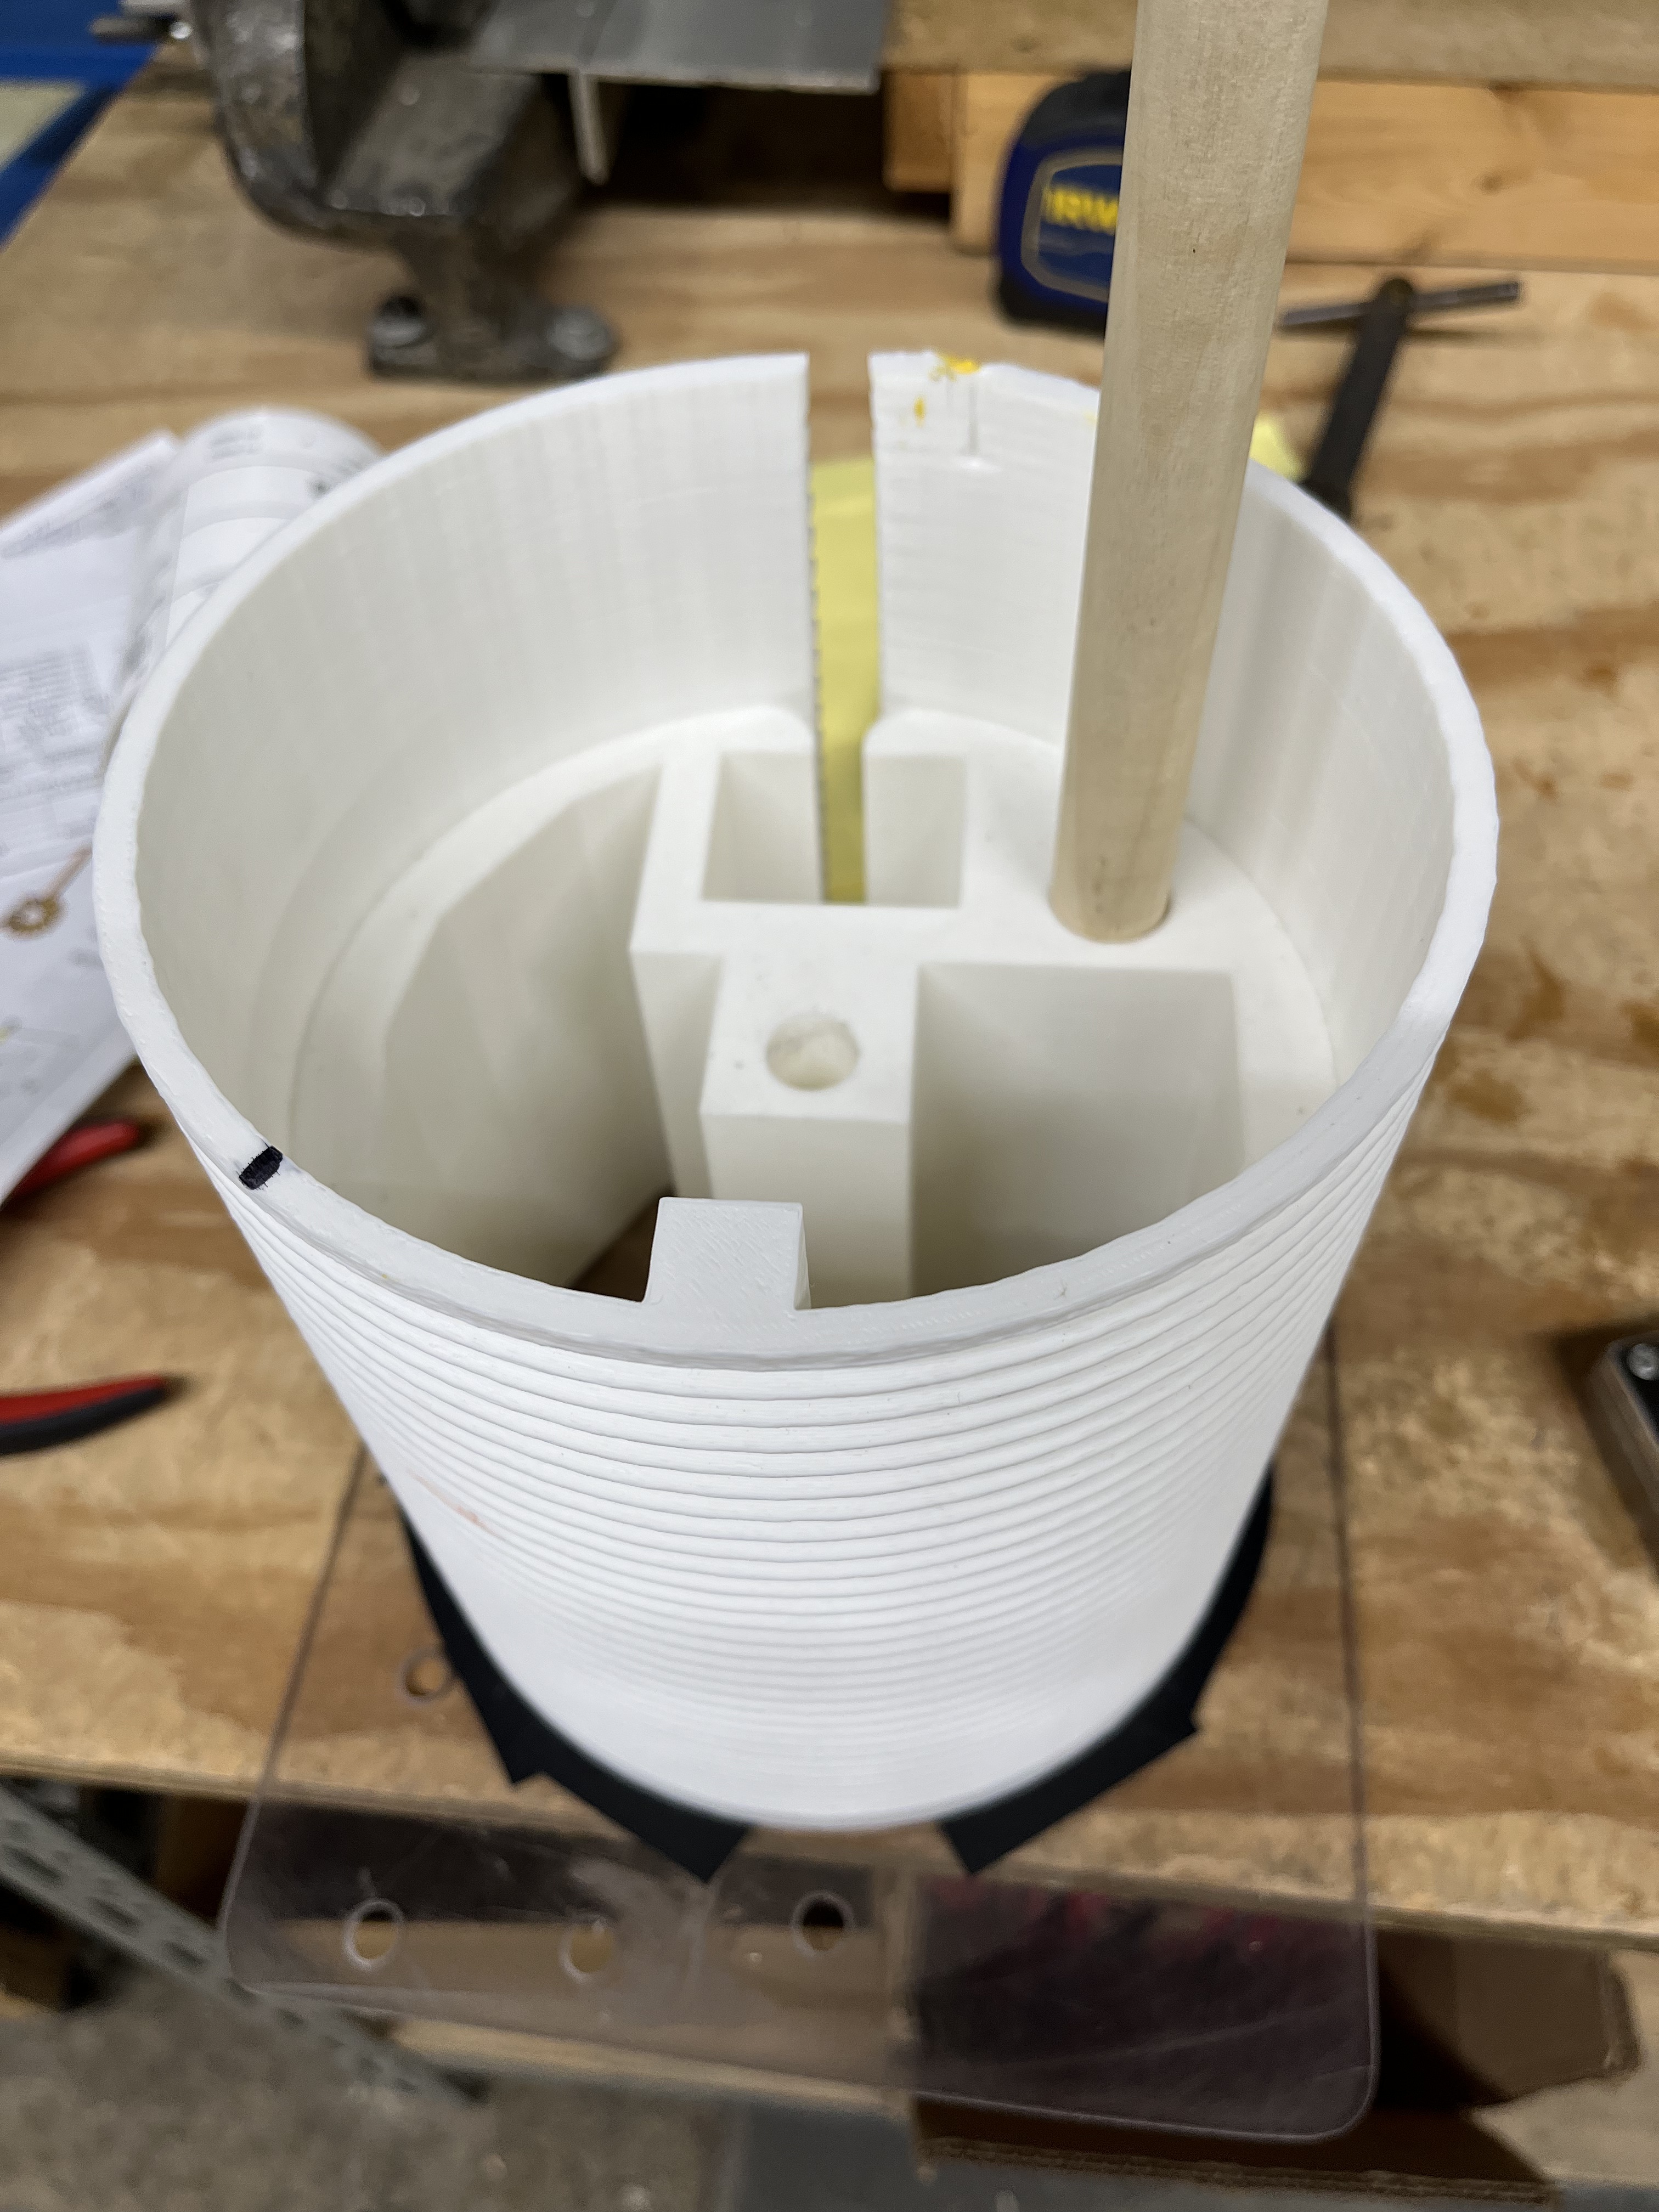
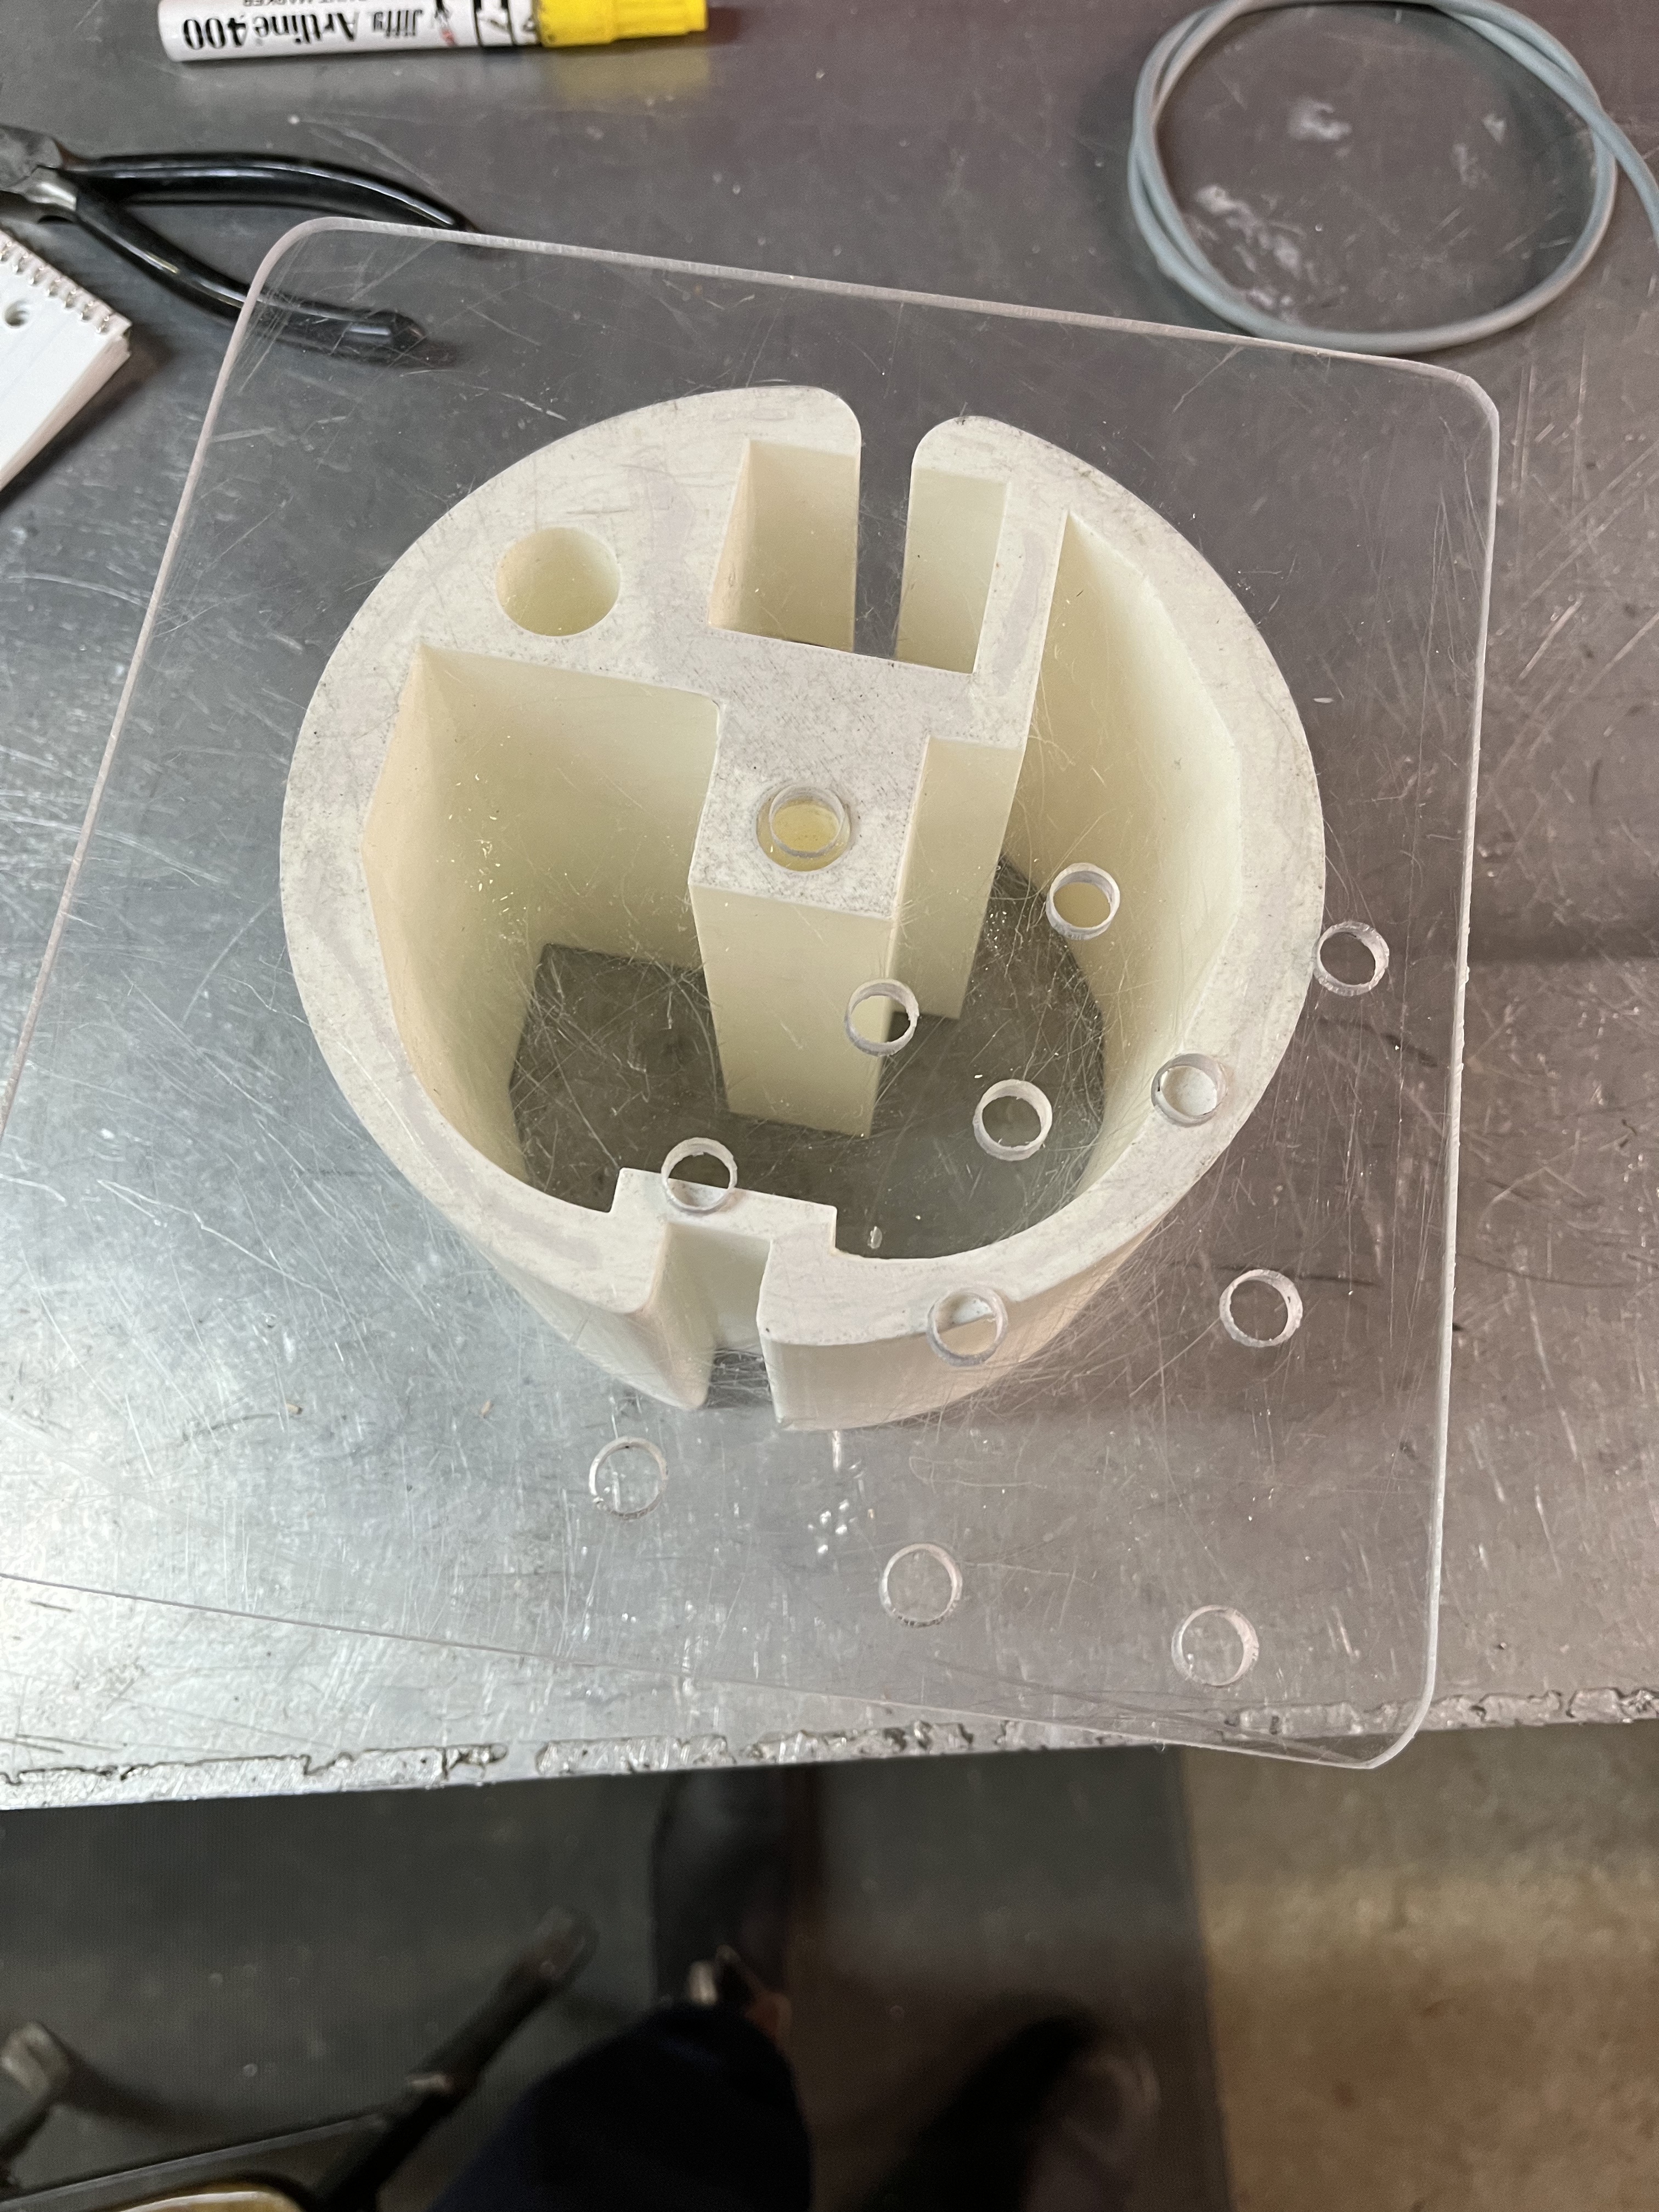
Wire “Salad Spinner” Jig
Jan 2025 – Jan 2025
What
Redesigned the wire-wrapping process to produce consistent, tangle-free wire lengths for production use.
How
- Identified inefficiencies in the manual spool unwinding and rewrapping process
- Prototyped multiple 3D-printed designs to automate and standardize wrapping
- Designed a threaded sliding ring with guided ridges in SOLIDWORKS for precise coil spacing
- Replaced unreliable mechanical counters with visual reference markers for repeatable lengths
Result
- Reduced wire-wrapping time from 8 minutes to 3 minutes per unit
- Eliminated tangling and length inconsistencies
- Improved throughput and reliability for high-volume production
-
Final Product


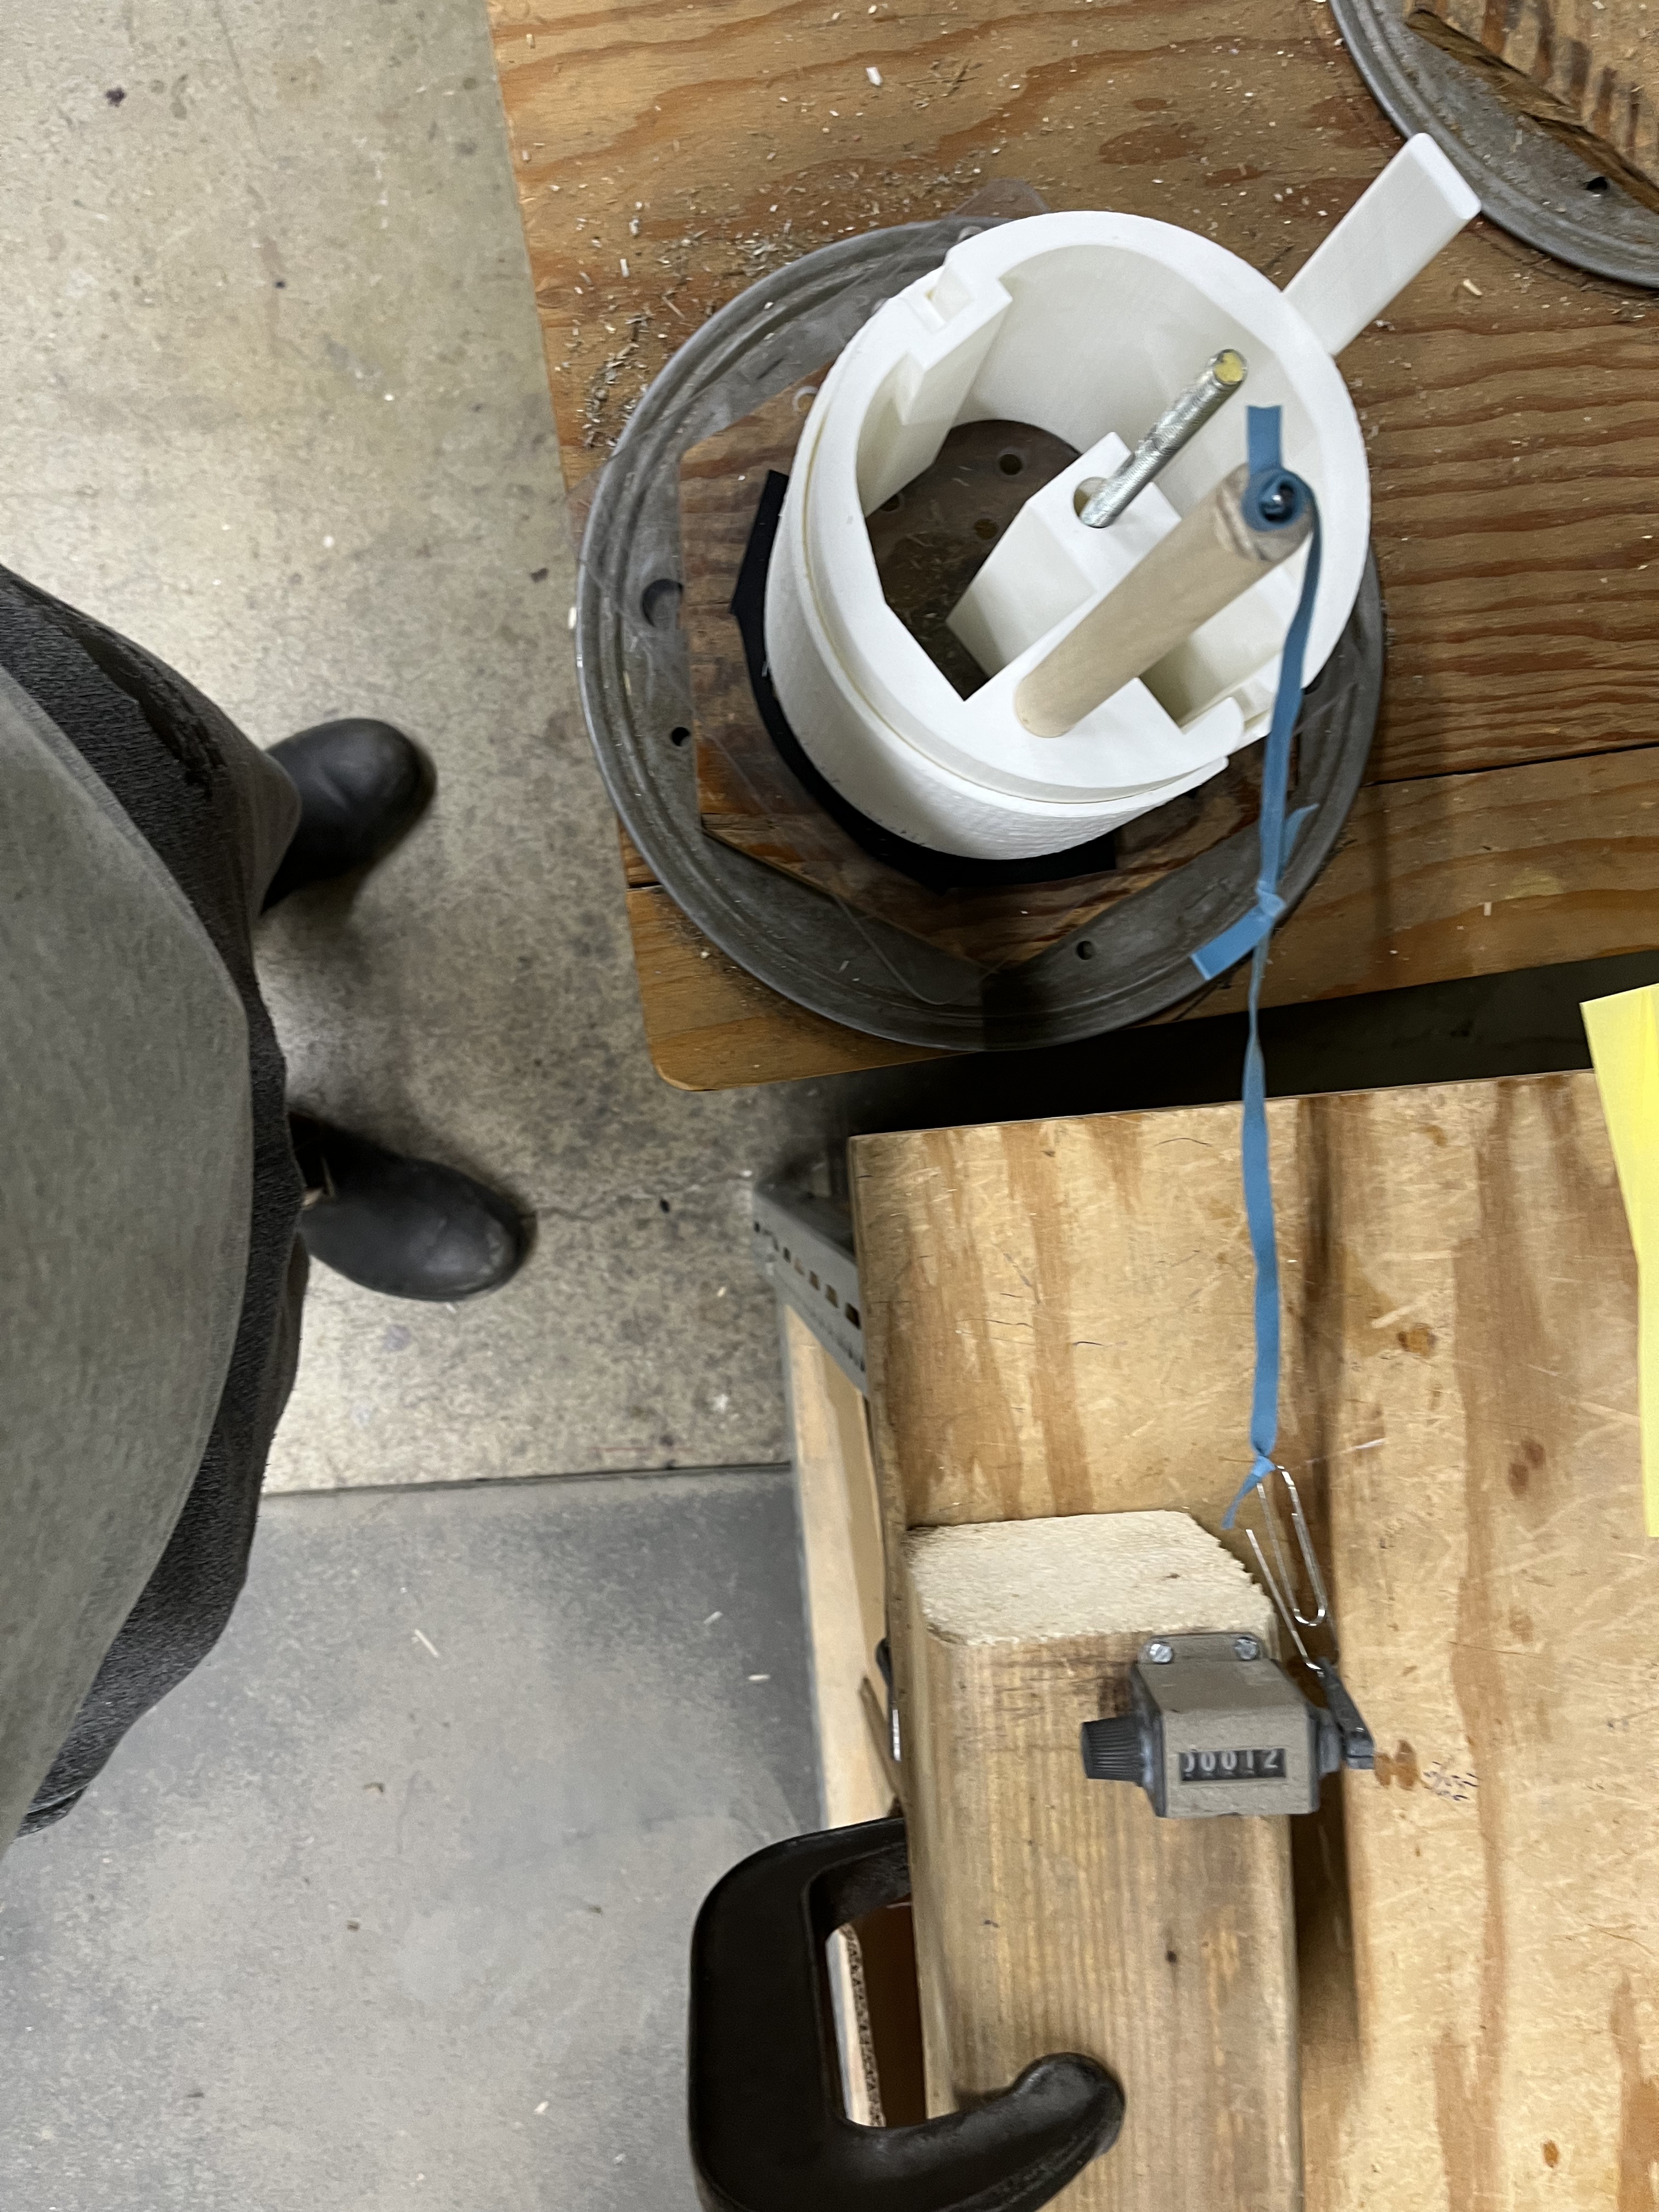

First iterations
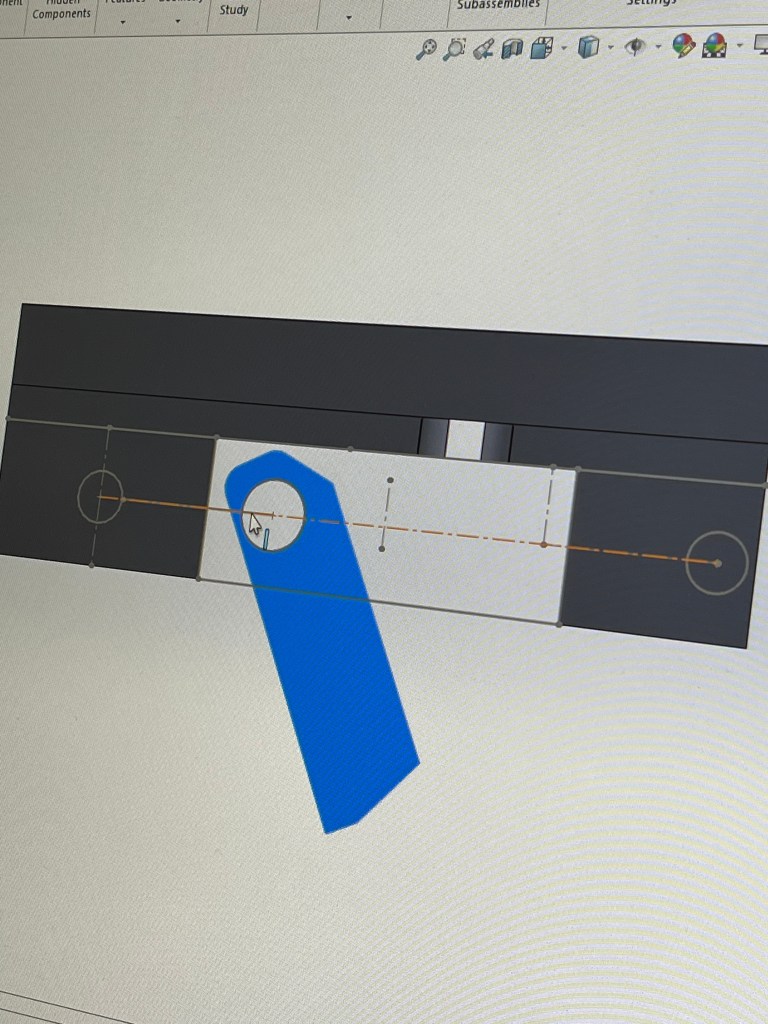
Wire Wrapping Visual Indicator
Jan 2025 – Jan 2025
What
Designed a visual guide to help production workers accurately gauge wire lengths during transformer winding.
How
- Identified difficulty in estimating wire length as a source of inconsistency on the production floor
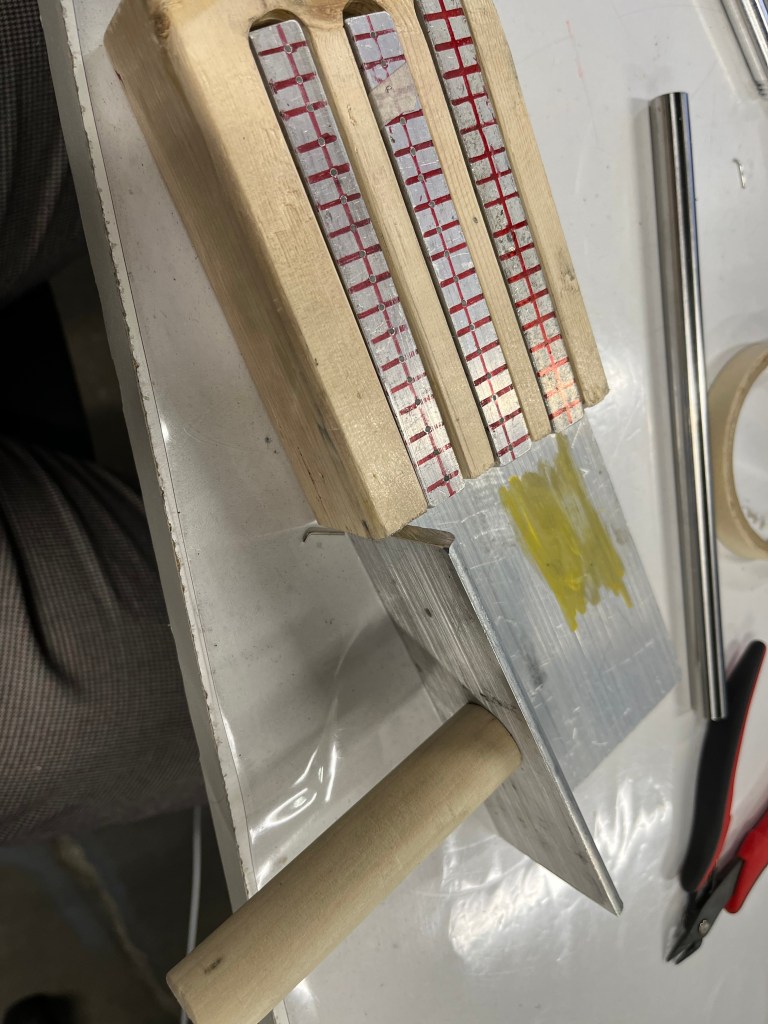
- Built an initial “flag” prototype from scrap plastic, an aluminum rod, and tape as a quick proof of concept
- Discovered compatibility issues with the existing steel production jig and iterated on the design
- Designed and 3D printed a custom wrap-around jig that secured directly to the part
- Added an adjustable set screw to allow positioning at multiple angles while remaining jig-compatible
Result
- Delivered a functional, production-compatible visual guide
- Improved ease and consistency of wire length estimation
- Gained hands-on experience with 3D printing, now a core tool in my workflow
- Reinforced the value of close collaboration with production workers and managers
-


Final Product

First prototyppe – The Flag
